Rendering Linear and Rotating Movements and Speed
Rendering Linear and Rotating Movements and Speed
Being able to render movement is key if we want to make our manga to render the energy and the intensity of the actions we depict. The effect can be rendered in manga using various techniques such as speed lines, or speedlines, or blurring…
There are many variations and testing and choosing the one that you like the most will become a key element of your drawing style.
The artistic approach to rendering the impression of movement and speed
The artistic approach to movement has been derived from photography.
When someone takes a static photo of a moving element, that moving element will appear blurry and leave streaks on the picture due to the fact that this element moved during the photo exposure time. You can see an example below where people moving on a street photography are blurry. The blurriness is related to the speed at which the people, or part of their bodies, moved during the photo exposure duration. For instance, if you look at the person with the white trousers at the bottom right, you can see that the foot that is on the ground looks clear, while the other leg which was moving looks blurry.
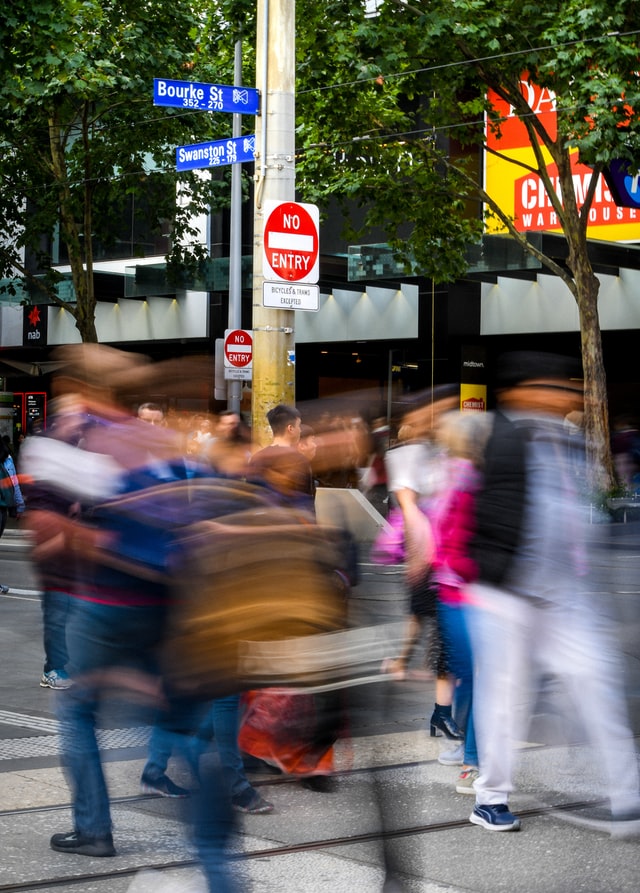
Photo by Heather McKean on Unsplash
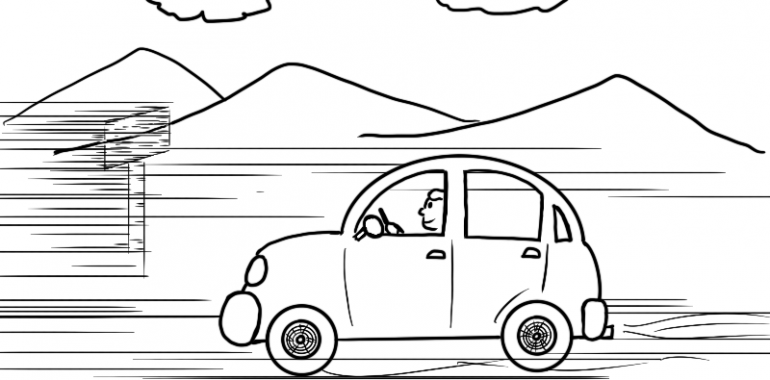
The same motion blur phenomenon can be spotted on pictures taken from a moving element, as from the window of a car or of a train for example. The environment will look blurry due to its relative movement to the moving element during the photo exposure time. You can see the effect on the picture below taken from the window of a car where elements close to the car are blurry and leave streaks.

Photo by Alessio Lin on Unsplash
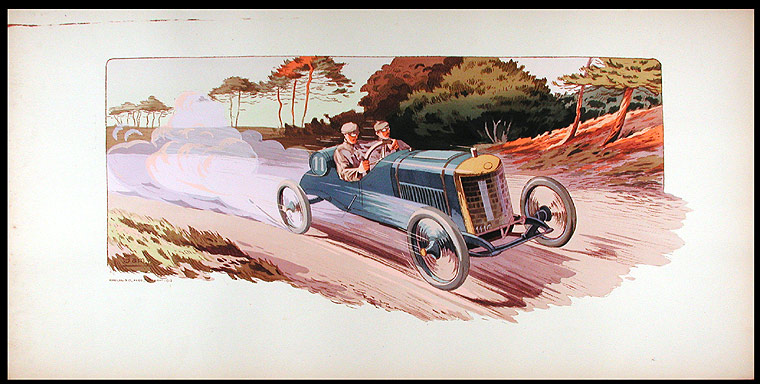
This is what lead to the introduction of speed lines on some paintings and drawings. Speed lines were seen for the first time in the years 1910s on posters where the French artist Ernest Montaut used them to indicate car movement and induced motion blur.
The amount of elements impacted by the motion blur and the length of the motion streaks will depend on the relative speed of the elements and their distance. The higher the speed and the longer will be the streaks. And the farther an element will be from the moving element, and the less it will be impacted by the blur.
Giving the sensation an element is moving
In this part, I will introduce the different techniques that can be used to draw an object moving in a scene. I will take the simple example of a ball, and you can yourself test these various techniques with other objects if you want to train for it.
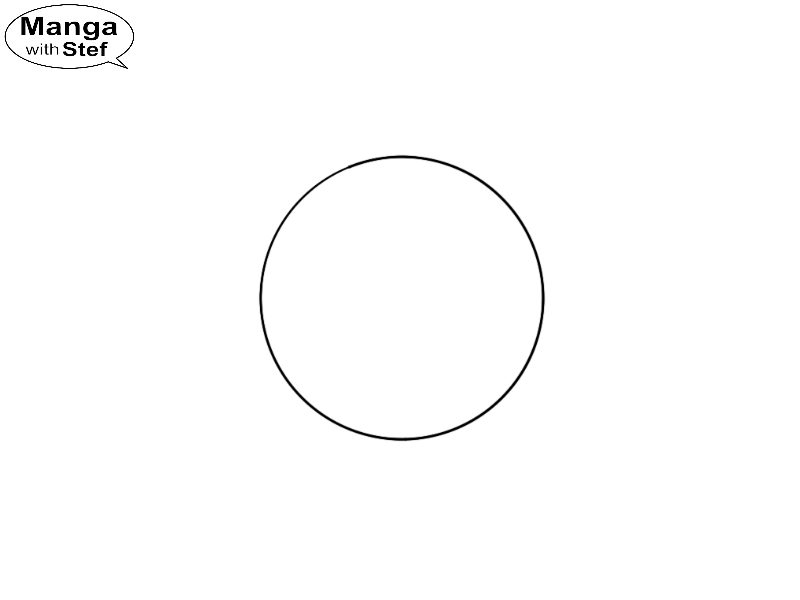
First, as the image below shows, without any specific effect an object, here a ball, appears to be static.
Now, to start approaching movement, we have to decide how much we want readers to feel that element moved during the time we « pictured » it. You can achieve that by drawing the positions of that element at the beginning and at the end of of the pictured movement. In the following image for instance I drew a ball and some of the positions it occupied. Color is faded as we go back in time.
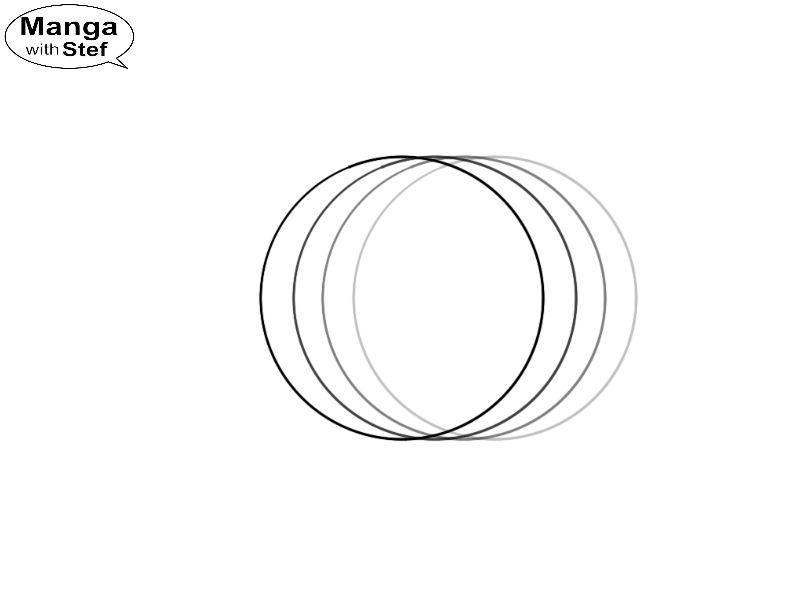
Now that we have an idea of how much the ball moved in the picture, we can start to render that movement to the readers.
Fading positions
The first method will be to indicate previous positions of the ball with strokes taken from the shape of that object. For instance I used some small arcs to picture where the border had been during the movement. The stroke size will be smaller and smaller as we go back in time to indicate these position are fading out.
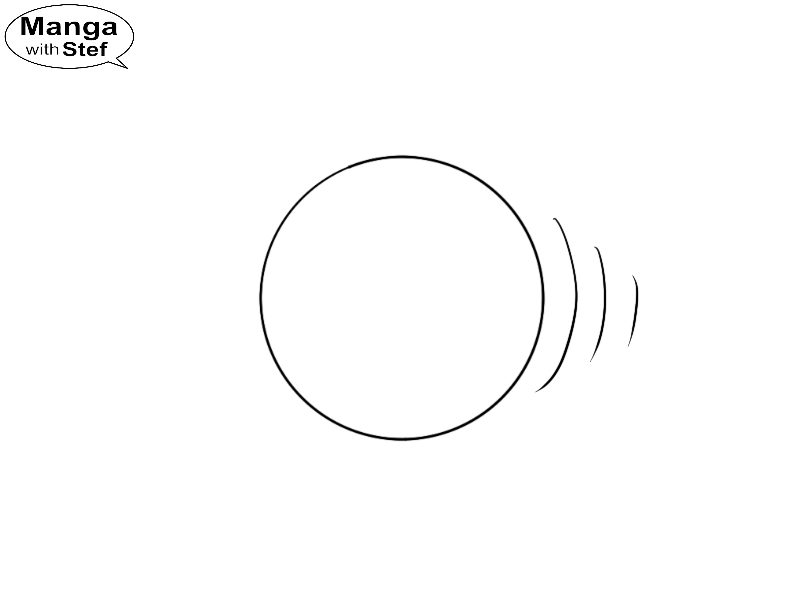
This method will be interpreted by our brains as if the subject is moving slowly. For instance the ball will be seen as hovering slowly in the air, or rolling. Increasing the distance between the strokes will give an impression of a higher speed, but not yet of something really quick.

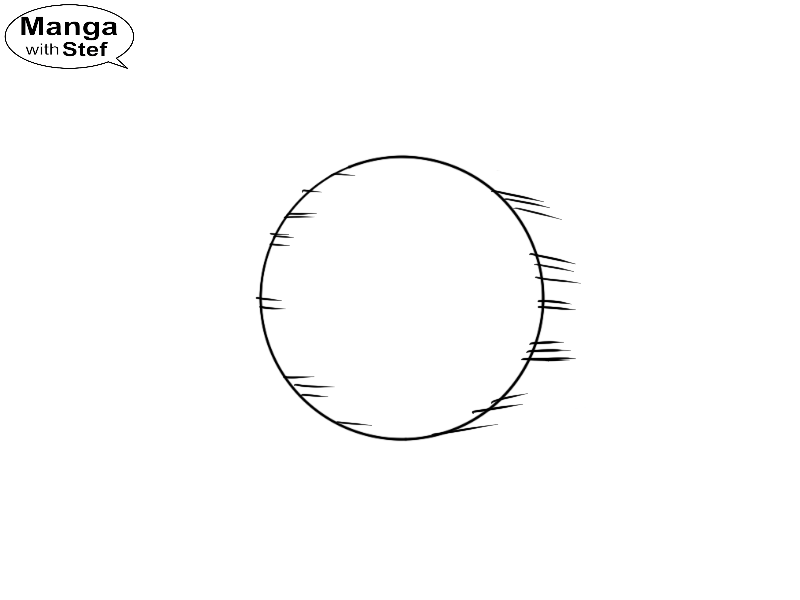
Speed lines
To give the impression of a greater speed, we will start to use or add speed lines. Speed lines will represent streaks let behind by the object during its movement. These streaks will be interpreted by our brains by something going fast. You can experience that feeling by looking at how, just by adding a few speed lines behind our moving ball it, suddenly seem to be moving faster.
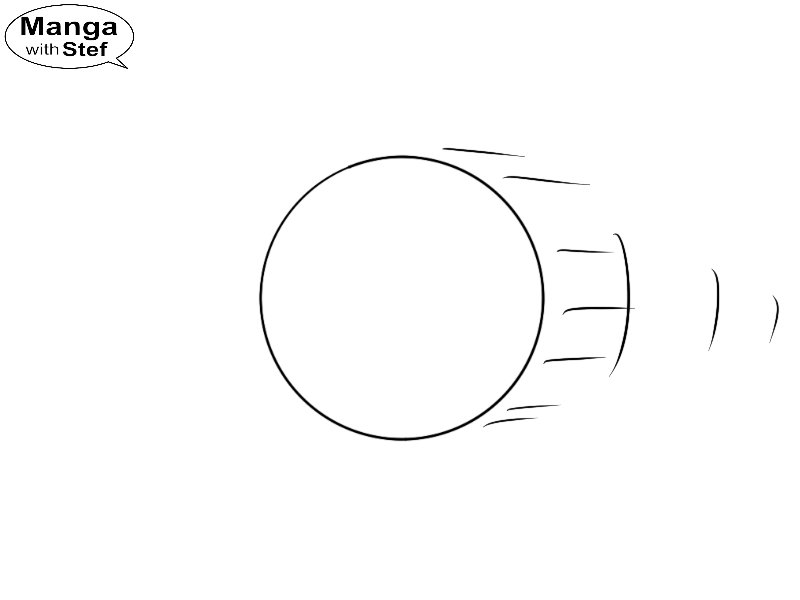
And again, increasing the length of the speed lines increases the sensation of speed.
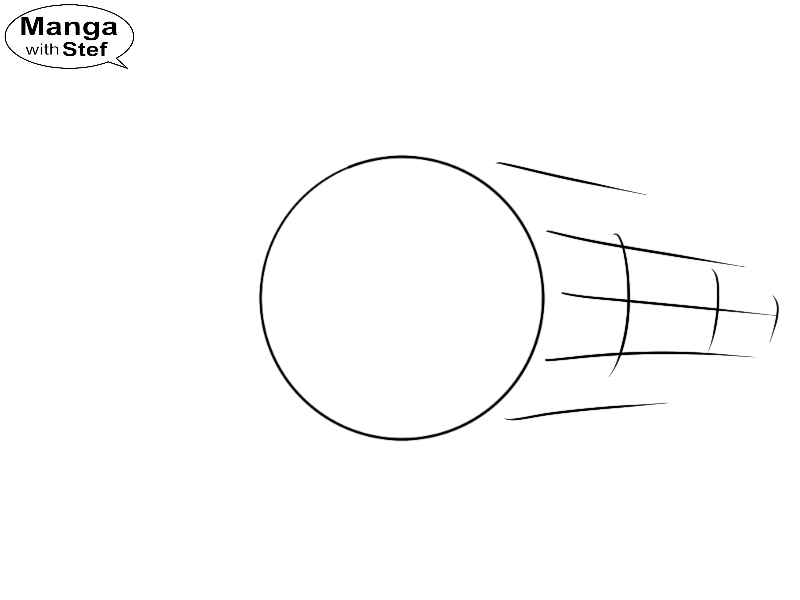
Blurring the shape
Another technique, relying also on speed lines, tries to better picture reality by blurring the shape of the moving element.
As this approach can be more time consuming, artists have developped different approaches.
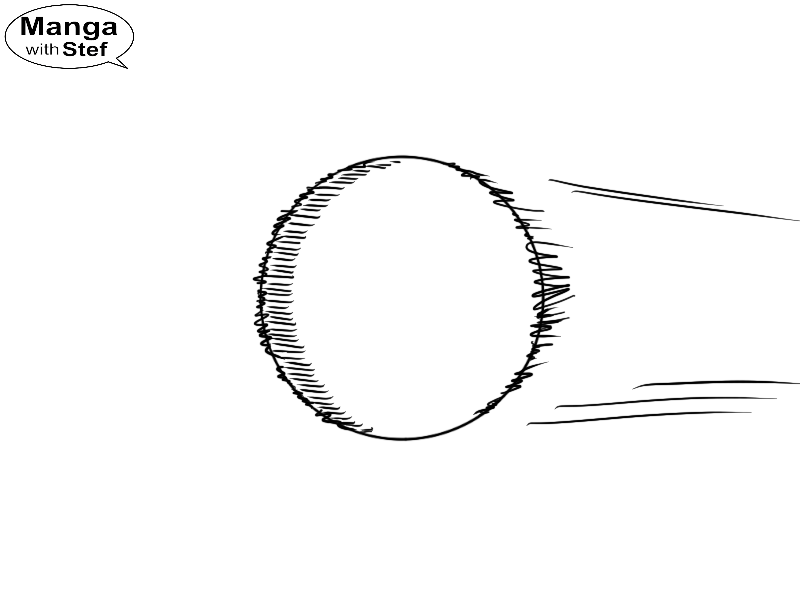
Some artists will draw the moving element and add some speed lines on that elements’ contour to kind of render that impression of blurriness.
And some will render the shape of the moving element fuzzy by drawing that element using hatching techniques. The hatching will include the trail let by the object during its movement.
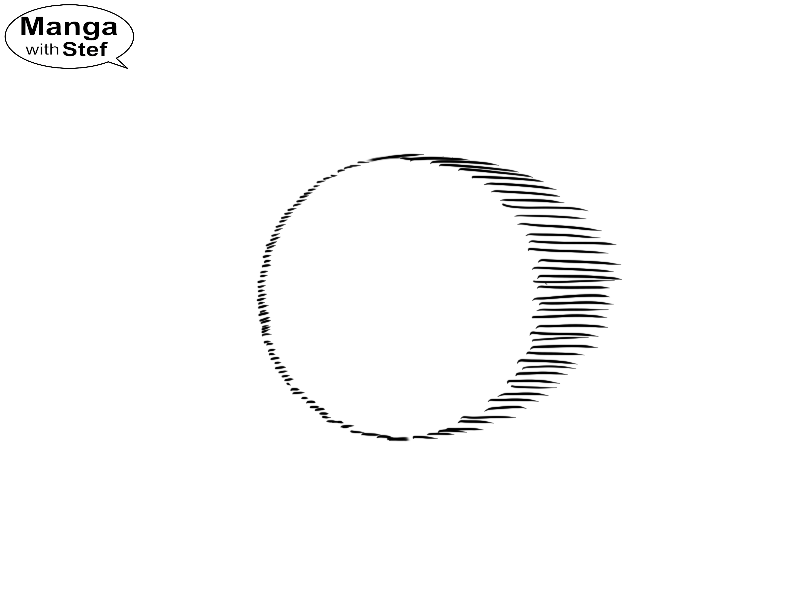
It is to be noted that this technique can be more time consuming and is generally used by simplifying the shapes. For instance a hand will become some kind of blurry shape with no distinguishable fingers.
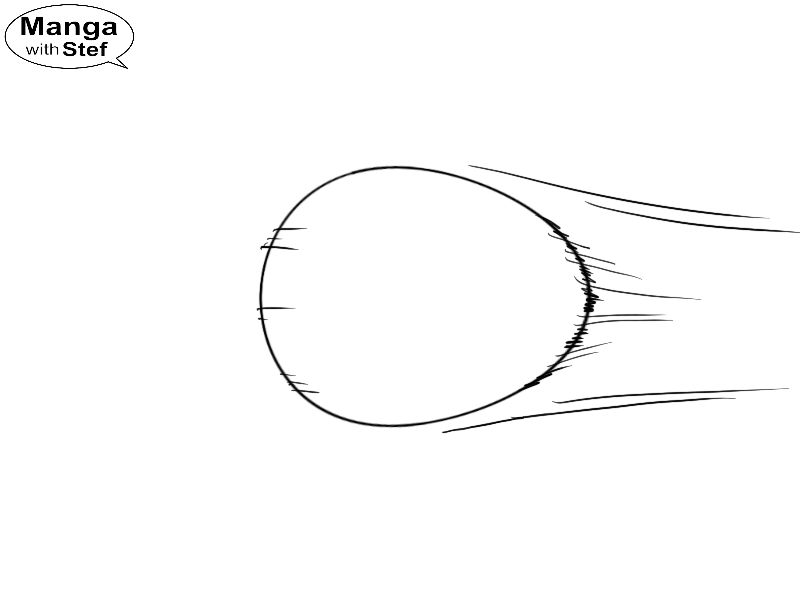
Some artists like the ones behind One Piece (Eiichiro Oda and his assistants), use their own techniques to render similar effects. In One Piece the moving element’s shape is drawn normally, and then some wiggly lines are added on top of that shape to give that sensation of blurriness. In addition, they also will use hatching inside filled objects to picture some movement streaks.
Adding deformations
A technique widely used in animation to accentuate the sensation of movement is to deform the shape, exaggerating the forces that apply to the object during its movement. This will be a ball taking an oval shape under acceleration, or a bean shape after having hit an object for instance.
As I indicated in the introduction, there are many techniques and you don’t have to use them all. Test them and just pick the one or the ones you feel the most at ease with to be part of your style.
Rotation speed
The ball in the example above was going straight forward, but we can easily give a sense of rotation. In the image below, for instance, see how adding hatching on both the internal sides of the ball gives the impression it is spinning around its vertical axis. And also you can see how giving a wavy shape to the speed lines give the impression it is spinning around its horizontal axis.
A notion to have in mind is also that for an orbiting element, the further it gets from its center of rotation, the higher the speed. This can be imaged again in the example above by taking two key positions in the movement:
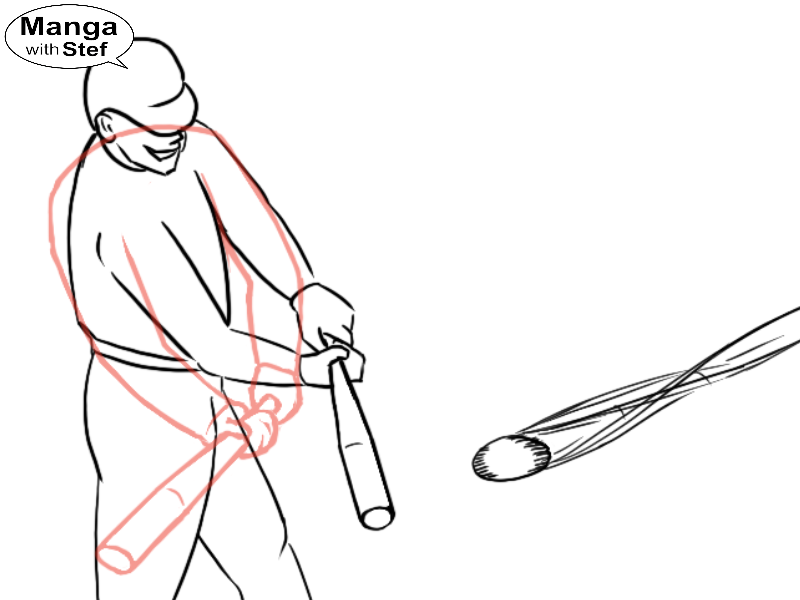
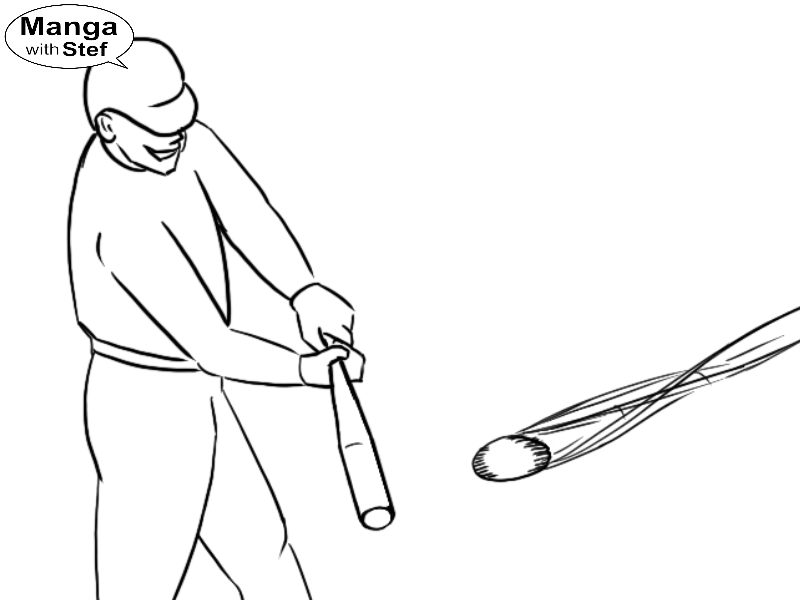
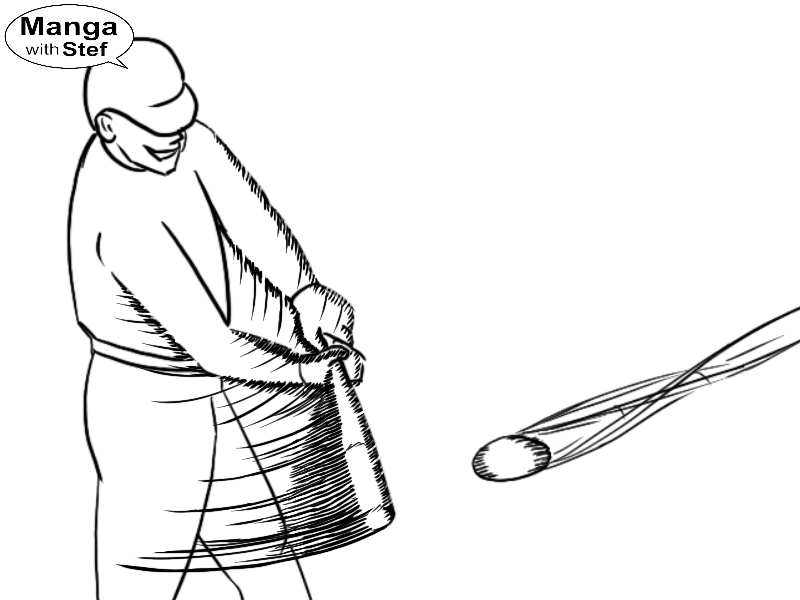
The image below pictures the amplitude of the rotation of different parts of the arms, bat and chest, around the rotation axis (the green cross below the head).
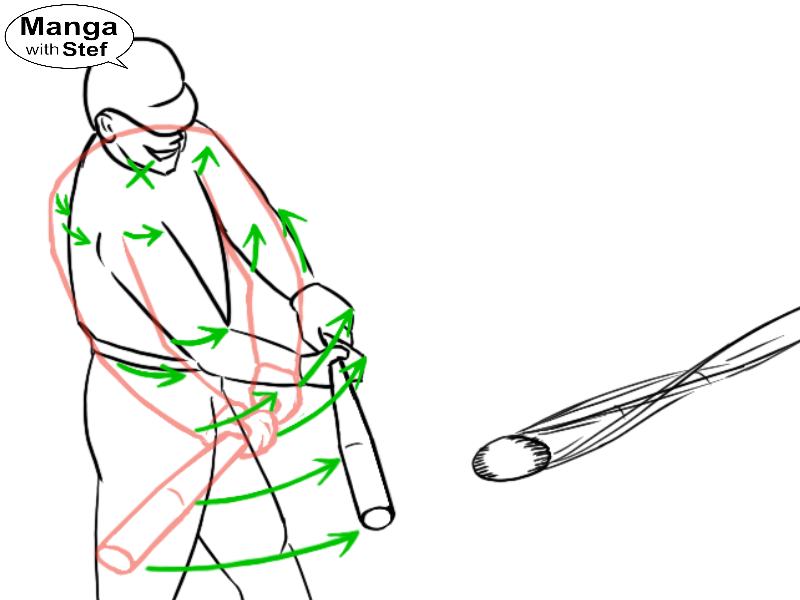
These can then be used as a baseline to draw the speed lines related to these rotating parts.
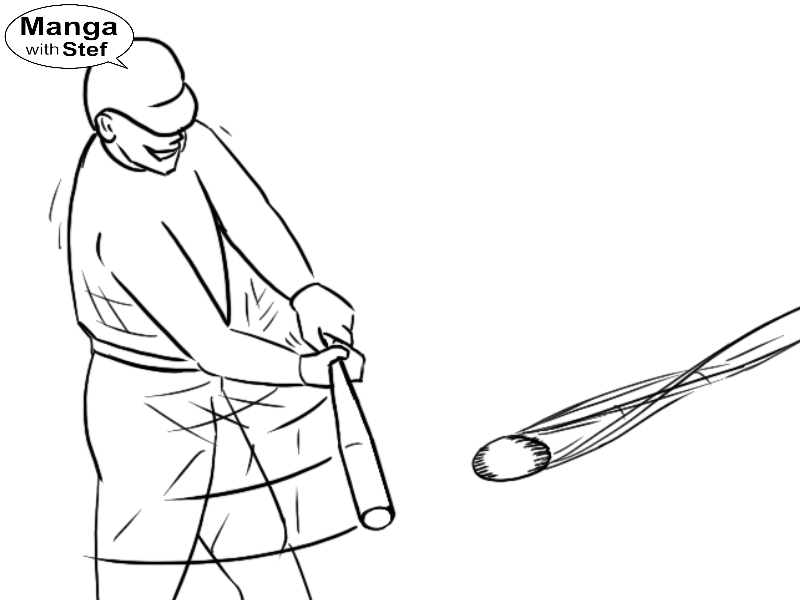
And of course this can be further emphasized by using more advanced techniques.
Focusing on a moving object
Now, similar techniques can be used to picture how the environment flows around an object in movement.
Let‘s take the example of a car. Again, without any effect, the car seems to have stopped.

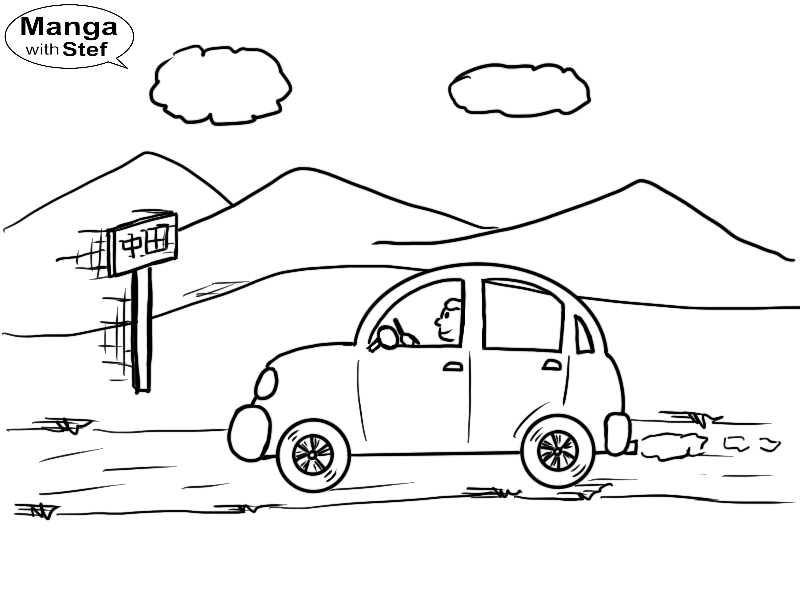
To denote a slow pace, we can use the technique of fading positions and some short speed lines on the elements around the car. Note how the elements in the background (the mountains and the clouds) are left unchanged to give an impression of distance from the car (this is called parallax).
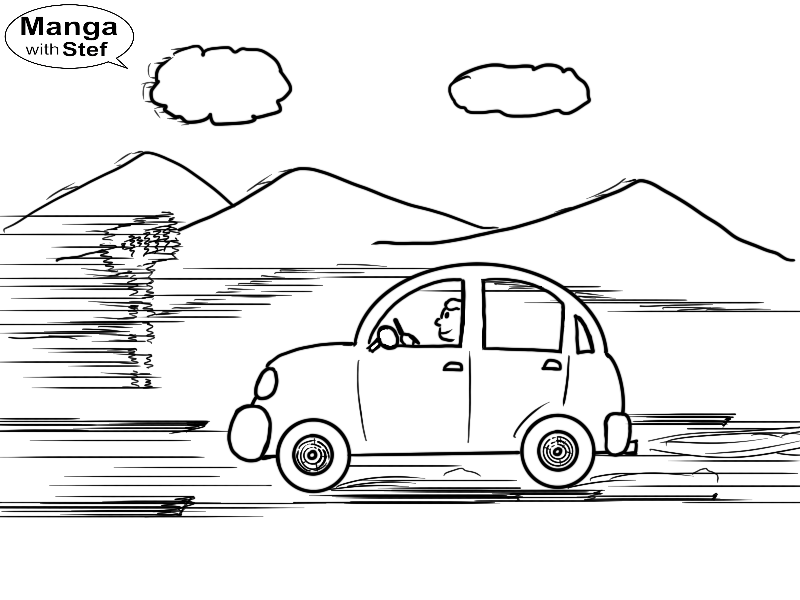
Higher speeds will require use of longer and longer speed lines, most of the environment close to the car becomes blurry… The closer to the car, the longer these speed lines will be, again to give that 3-dimensionality to the drawing.
… or fuzzy at higher speeds.
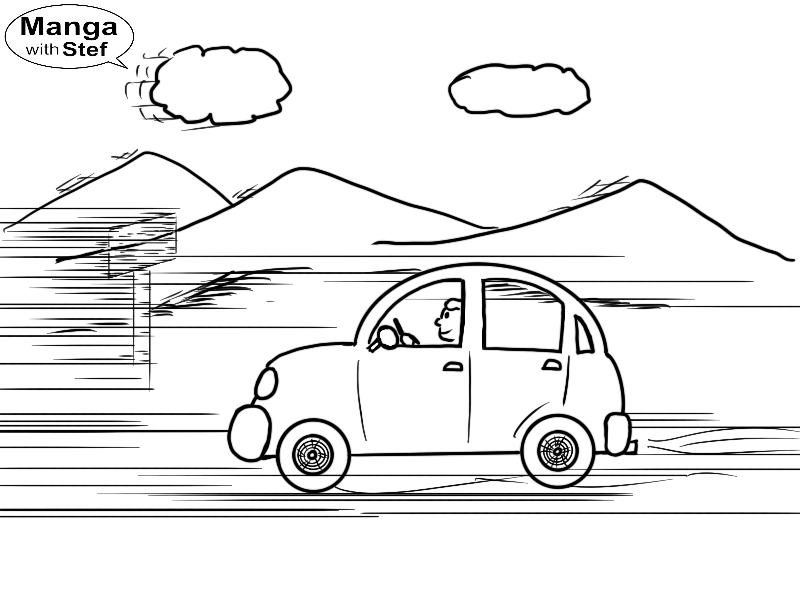
At even higher speeds we can make full abstraction of the elements surrounding the car and use only speed lines. Each stroke suggesting something vanishing or passing by so quickly we can’t really see what it was…
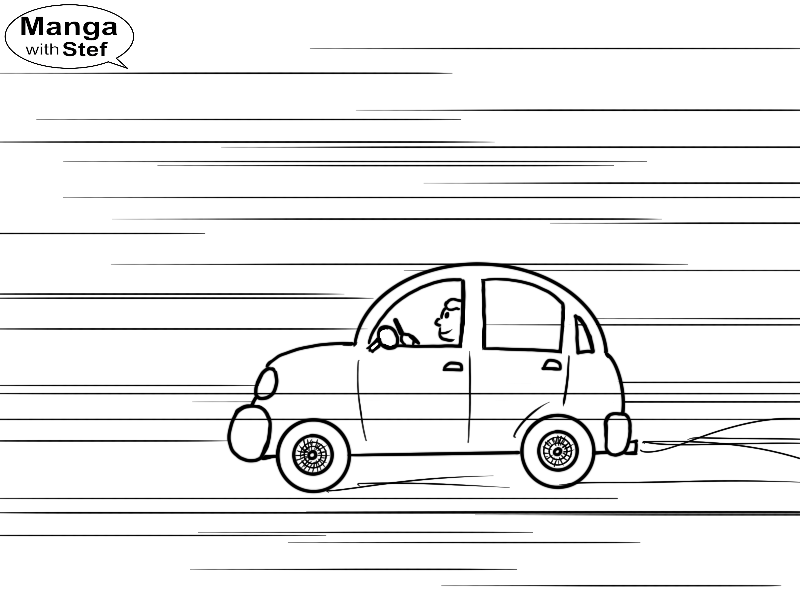
We could also have used some deformations to the car to accentuate the effect.
That last technique is very current in some action manga. It has the advantage of limiting the work that drawing a blurred or fuzzy environment would have required, and it gives full focus on the main subject by removing any distraction.
Key elements for quality speed lines and motion blur
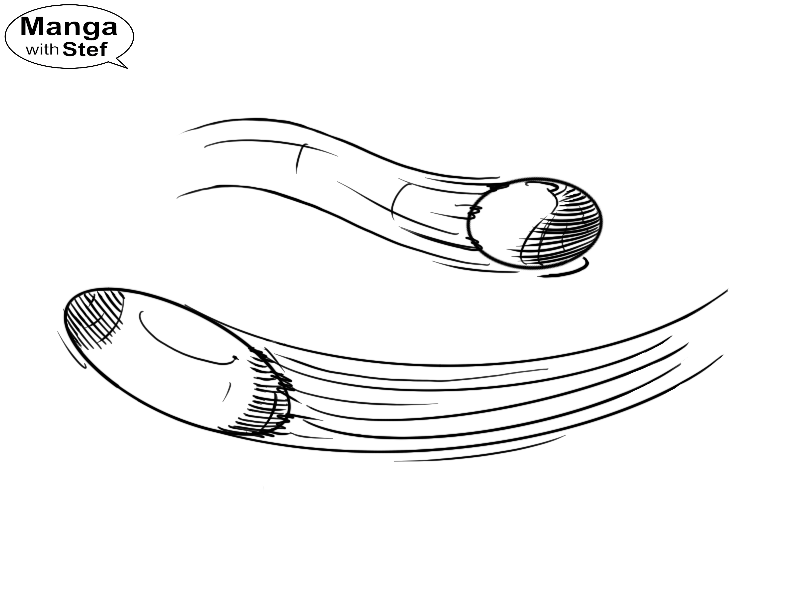
Motion blur and speed lines represent past positions of the subject. They therefore are behind the subject and they follow the direction of the movement:
- If the element goes straight, the speed lines and blur will be straight.
- If it rotates around an axis, then the speed lines and blur will rotate around that same axis.
- And if the subject changes direction during the movement, then so do the speed lines and blur.
Moreover, when an element is orbiting around a point, then the speed lines get longer as we move away from that rotation axis as a representation of higher speeds.
Finally, the further an element is from a moving object, the least it will be impacted by the motion blur (this is the parallax effect).
Drawing speed lines
Traditional method and tips
Speed lines are generally drawn during or after the initial inking of your drawing using a pen with good ink flow or liquid ink. You can also use a ruler to help you in the process.
You have to either make a swiping movement with your wrist or gradually release the pressure on the tip of the pen to give strokes a slight feathering (meaning the width of the stroke becomes smaller and smaller).
The heavier part of the stroke should be at the latest position of the subject and the lighter part of the stroke at the earliest to give the impression the streak is fading away because of time. It is also generally a good idea to go from top to bottom to avoid your hands or ruler going over your latest strokes and smudging your drawing.
As indicated in my article about inking your manga pages, don’t set the flat edge of your ruler at the bottom to avoid ink being sucked under it.
Also take care if you are using nibs and China ink as you can easily spread ink spots around during the process if you swipe too quickly.
You can in addition put some tape over some parts of your drawing you want to preserve if your strokes should cross it. Just be careful to use tape that does not stick too much to your paper to avoid peeling your paper when removing it. Alternatively you can try to use some masking fluid rubber in place of the tape, or you can also use white ink to cover the parts of the speed lines that you don’t want, but this last method might get a bit messy if not used carefully.
Digital method
You have two options when working digitally: using build in tools available in your drawing software, or using pre-build speed lines or flash patterns.
Software like MediBang Paint or PaintClipStudio have dedicated features designed to ease the process of drawing speed lines and flashes. And if you are using more standard drawing applications like PhotoShop or Procreate, you can use the drawing guides features they have available.
You can easily find pre-built pattern on the internet, and you can also use speed lines patterns like the ones I provide for free.
I hope this article did provide you with a good baseline to be able to start using these techniques in your drawings and manga.
Do not hesitate to ask questions if you have any. You can also leave a comment or share this article if this was useful to you.
Stef