Inking a Manga Page
Inking a Manga Page
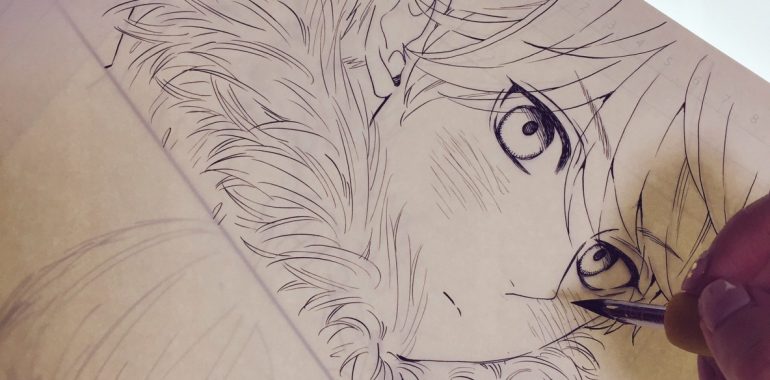
The inking of a manga page (ペン入れ – PEN ire in Japanese) is a key stage in the realisation of a manga. From this stage on, every stroke you draw is intended for your readers to see. This is therefore the stage where the artist style and technique is the most critical.
Inking relies principally on the experience and dexterity of the artist. To know inking, you have to practice inking. Draw things and ink them, testing different techniques and tools, and pick your favourite.
In this article I will present the main techniques and tools you can use for the inking of a manga page, as well as some points of caution.
Techniques to ink a manga page
As stated in the article about doing the rough sketch of you manga, there are 3 main techniques to do the inking of a manga page:
- Inking over your sketch and erasing your sketch
- or Inking over your sketch but keeping your sketch
- or Inking on a new sheet of paper using a light table
Here are the pros and cons of these techniques:
Inking over your sketch and erasing your sketch
As the name says, you ink your drawing by tracing over your rough sketch. Then, once your ink is dry, you erase your sketch with an eraser.
Pros and cons:
- You erase your rough sketch.This means that you wont keep any physical trace of it. Also, you will not be able to reuse and modify it in case you spot a problem later on on your finished drawing.
- Moreover erasing your sketch can lead to paper tearing or folding, and ink bleeding or fading if you are not careful enough.
- You can apply shading (hatching…) and colours (watercolours…) directly over the inked drawing.
- Requires 1 sheet of paper per page.
Inking over your sketch but keeping your sketch
This technique generally involves using a non-photo blue pencil. Scanners are less sensitive to certain colour ranges, and the blue colour is part of one of these ranges. You can therefore normally easily filter out this colour when scanning your pages. This should allow you to publish your pages directly without needed cleaning.
Pros and cons:
- Your rough sketch is still visible under the ink (could be good for showcase your process) but will need to be re-done in case inking goes bad. Alternate option would be to use a light table.
- You can do hatching, dotting, or apply screen tones directly on the inked drawing. But techniques relying on transparent media (alcohol markers, watercolours…) might not be usable as the sketch might show through it and be difficult or impossible to filter out.
- Requires 1 sheet of paper per page, and non-photo blue or red pencils for sketching.
Inking on a new sheet of paper using a light table
For this technique, you use a light table on which you put your rough sketch, and then overlay the sheet of paper that will be receive the inked drawing. You will be able to trace the sketch following the sketch that shows through thanks to the light.
Pros and cons:
- You will keep your rough sketch intact and you will be able to re-use and modify it in case of something going wrong with the inked page.
- Light table can be bulky and render some inking steps a bit complex.
- Light table requires you to use some low or mid-weight paper for light to pass through. You cannot use it with heavy paper such as the one used for watercolours.
- You can apply shading and colours directly over the inked drawing.
- Requires 2 sheets of paper per page, and good light tables can cost some money.
Making a choice
None of these technique is perfect, and none is better than the others. Manga artist simply pick the one that best fits their workflow.
The choice can depend on whether or not you want to keep your rough sketches (note you could keep copies by taking pictures or scanning them) and how you want to proceed for the colouring stage.
If you don’t know where to start, go for the first one as it is quite easy to use. But be cautious during the erasing step. Check that your ink is dry before erasing, and do not be too hard when rubbing your eraser.
Tools used for the inking of a manga page
Different pens are available to do the inking of a manga page:
- pen and ink pens
- fineliners
- pen and nibs with ink
- brushes with ink
Do not hesitate to test different types of pen to find the one you like the most. Pen and inking is mainly a question of style.
Pen and ink pens
You can use standard pens or ink pens.
Be aware that they might not all be good solutions for drawing activities.
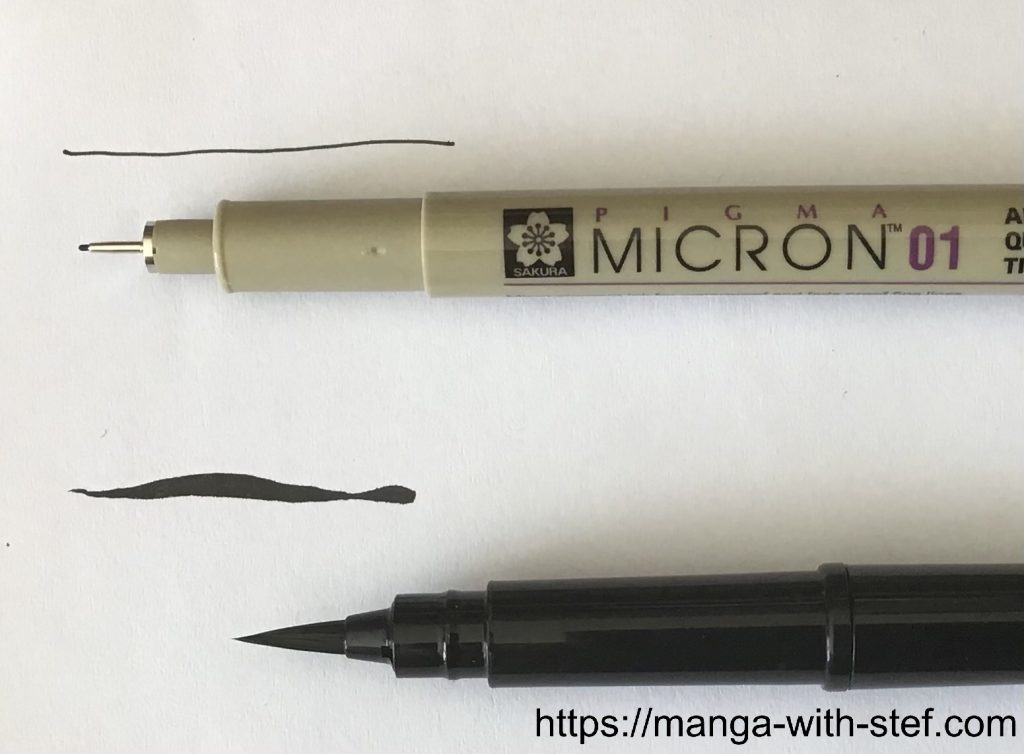
Fineliners
Fineliners are pens with a calibrated point size. They therefore allow to keep the width of your strokes even. Because of this, artists generally use fineliners for detail and texture works.
If you intend to use finalisers for your entire inking though and wish for a specific style, you can use a combination of two different fineliner sizes. This will to add some dynamic and interest to your line art. For instance you can use a large tip for the shapes outlines, and a smaller one for details.
Pen and nibs
Pen and nibs allow to slightly vary the width of your strokes by changing the pressure on the pen. This characteristic allows to get dynamic and interesting strokes which has made them a mythical manga inking tool.
Different nib offer different width and flexibility, the most commonly used being the G-Pen which allows for large dynamic strokes, and the Maru pen for finer and more consistent strokes.
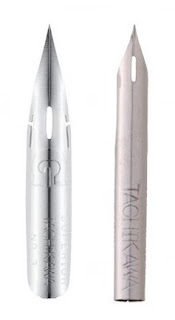
G-Pen nibs on Amazon | Maru pen nibs on Amazon |
Because of their pointy shape, these nibs can be difficult to use. If you don’t use them correctly, the point can tear the surface or your paper or it can get stuck in the paper fabric and lead to smudges. You therefore have to be able to rotate your page according to the direction you want to give to your strokes.
Beware also of ink droplets and bubbles that can spill or form as you draw or move your pen.
Even though it is a complex tool to use, it is also quite satisfying. You have first the smell of ink, then the so characteristic sound of the nib scratching the paper which give this approach something special. And the final rendering of the lines is itself really unique. Therefore do not hesitate to give it a try.
Brushes and brush pens
Brushes and brush pens (be it felt tip or bristle tip) do also offer dynamic strokes that vary with the pressure you make on the pen.
The fact that they have bristles or felt tuft make them more sensitive to pressure variation. They therefore require more care and control to use. This characteristic gives them flexibility and elasticity allowing them to follow the movement of the wrist in any direction and allowing for really dynamic strokes.
Here again, beware of droplets and bubbles that can spill or form as you draw or move your brush.
Ruler
You will use a ruler to draw panels and architectural elements.
You need to have a ruler with a bevelled border and to ensure the gap is on the side of the paper. This will allow you to draw lines without the ink getting sucked below the ruler and smudging.
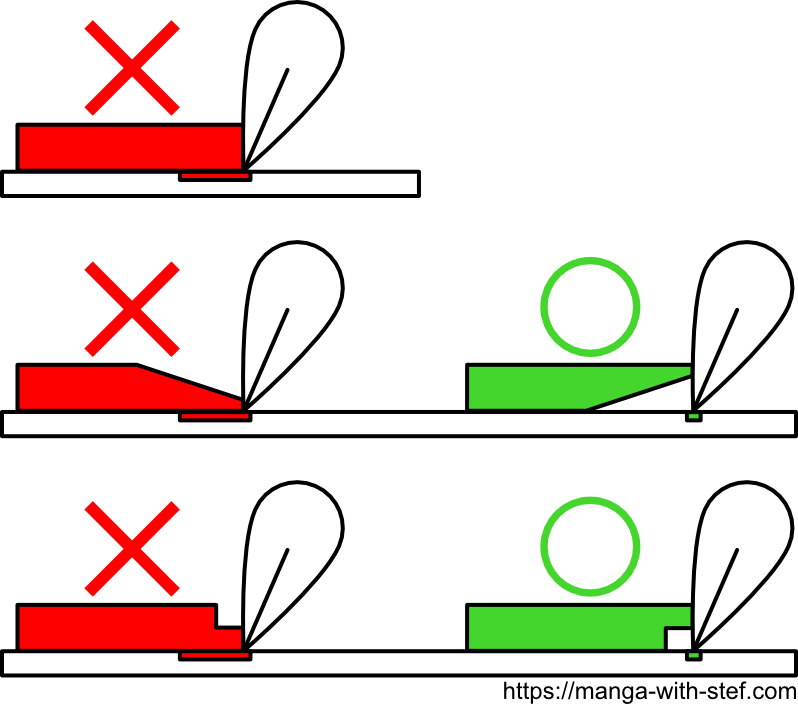
Also take care to wipe your ruler clean after each stroke.
White corrector
In case of smudges or mistakes, do not hesitate to use a white corrector pen to hide these. YOu can use brush correctors to cover large areas, and a pen correctors fine tip or will allow for precise corrections.
Professional manga artists do use white corrector everyday. You will be able to remove traces from the corrector through digitisation and post processing if needed.
Light table
A light table is a table that casts light through its top. When putting your sketch on the table and overlaying a blank sheet of paper over it you will be able to see your sketch by transparency thanks to the light.
Manga artist generally attach together the sketch and the sheet being inked. This allows them to easily move the sheets on the table and to position them in a way that eases the inking.
Caution words
Again, when inking a manga page, you have to be cautious as some errors might be difficult to recover.
First, ink takes some time to dry, therefore you shall be cautious of where you set your hands as it is common to spread ink over your drawing while moving your hands.
The same applies when erasing your sketch, if you have chosen this technique, as your eraser might also spread and carry ink.
Then, if you are using a dip pen or a brush, beware of drops and smudges when moving and laying your pen.
A cool tip I saw on that point was to have a roll of absorbent paper (a toilet paper roll for instance) under hand that you roll over your drawing to absorb ink. But make sure to practice the technique before using it…
I hope you found this article useful. Do not hesitate to comment or ask questions.
See you,
Stef