Drawing a manga character’s head
Drawing a manga character’s head
In this article, I will show you step by step how to draw the head of a manga character facing forward. If you are a beginner, you will also discover techniques used by many professionals to ensure consistency in the features of your characters, as well as the basis of a professional drawing workflow.
The process in itself will go in 3 steps:
- Drawing the guide lines for our character
- Sketching our character
- Inking and shading our character
Why shall I use drawing guide lines?
Drawing guide lines can seem useless, but I think it is key for beginner and intermediate artists to use them to get good face drawing. And if you have a look around, you will see many artists do use them too.
The main reason is that our brain and our eyes are keen on playing tricks to us, principally when symmetry and parallelism are at stake. You think you drew elements symmetrically, or parallel, and when you have a look at them later on you realise these are all skewed.
A good exercise to test that point is to make a drawing with symmetry and parallelism, and then flip the paper. You will see that suddenly what initially seemed to be alright is no longer looking so.
The guide lines are therefore here to give a strong basis for your drawing and enforce symmetry and parallelism.
Another reason why these guide lines are important is to allow you to reproduce your character. Getting a proper measure of the different features of the face of your characters will allow you to draw them consistently and avoid them from looking different from one drawing to the other.
Drawing technique
We will follow here a professional drawing workflow. We will therefore start with guidelines and a sketch of our character drawn using light pencil strokes.
Then we will finish with inking our drawing using a black pen.
You might also need an eraser and white corrector.
Step 1 – Drawing the guide lines
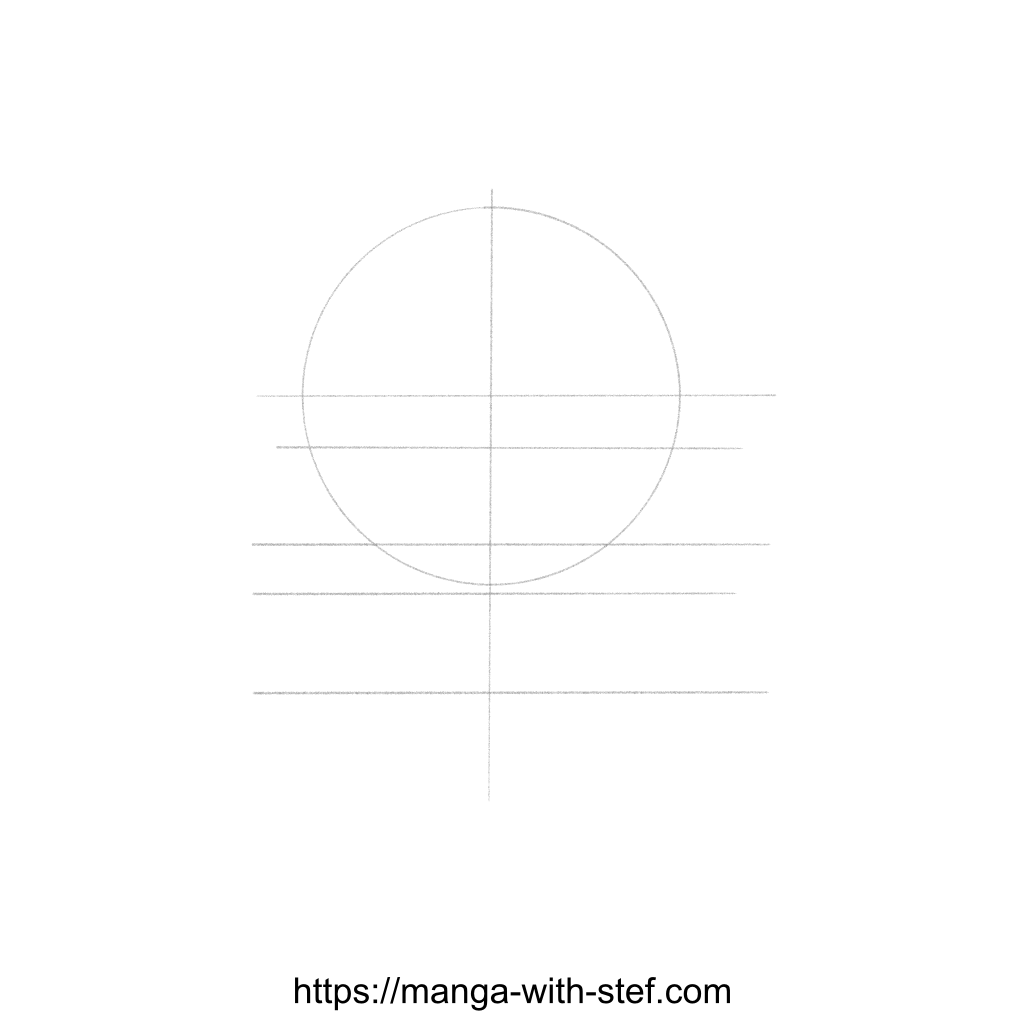
The way these guide lines are built is as follows.
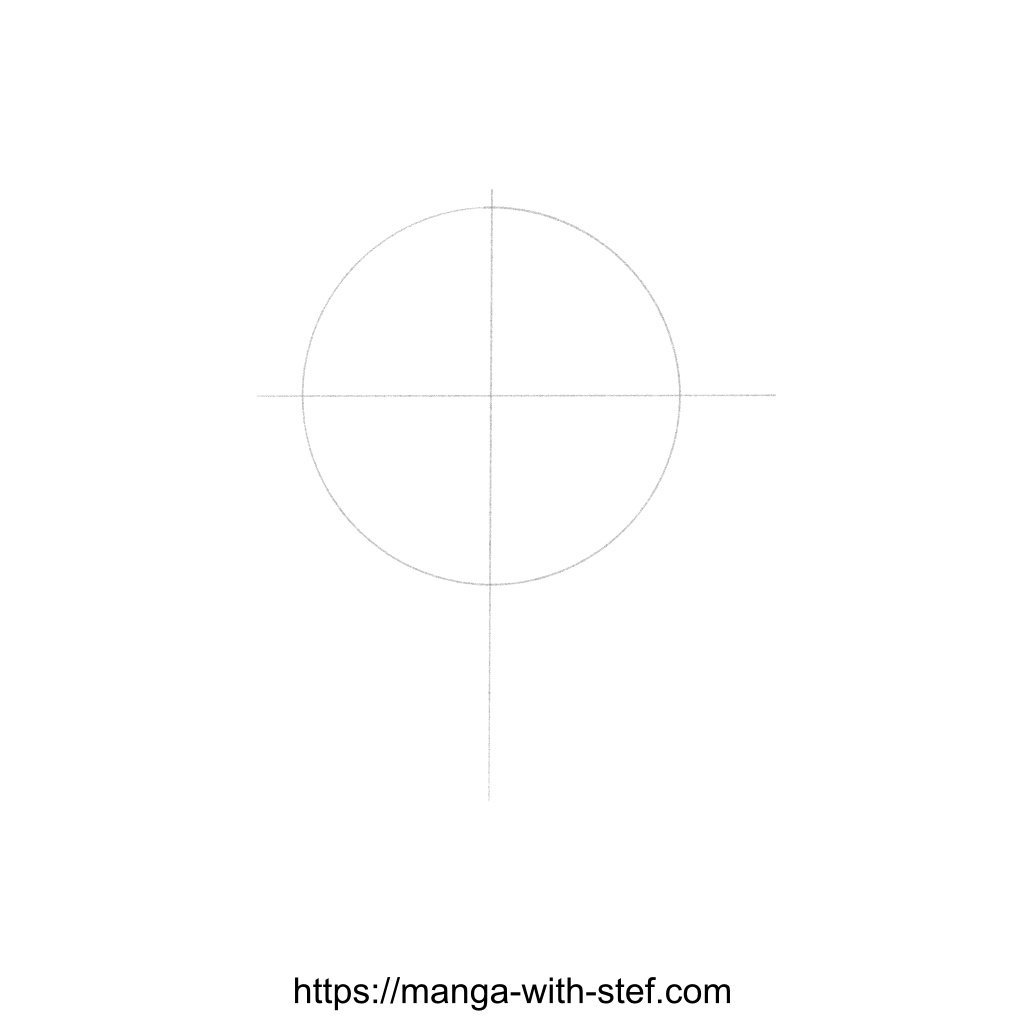
- Start by drawing a circle. This will be roughly representing the skull of your character.

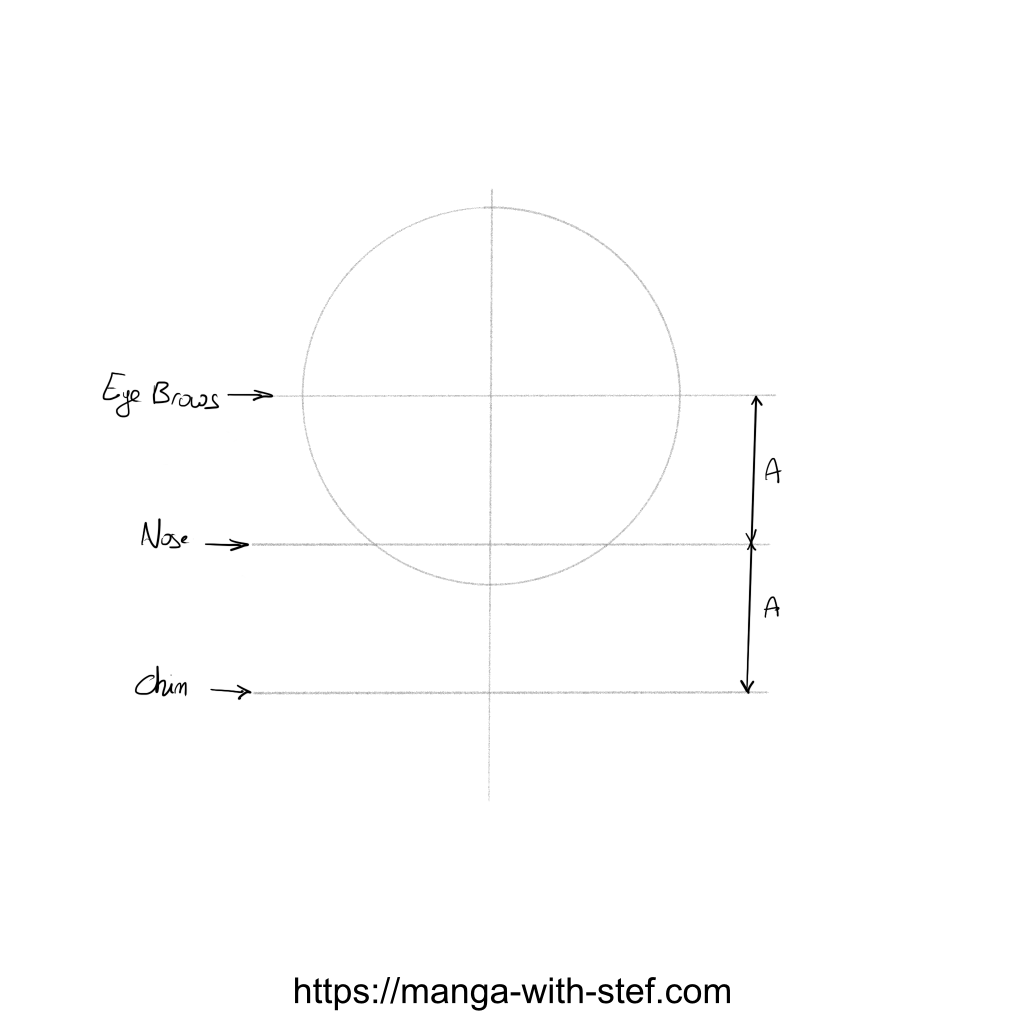
2. Next, we will add two lines that will cut the circle in half vertically and horizontally. The vertical line will indicate the symmetry axis of the face around which the eyes, the nose and the mouth will be aligned. The horizontal line will indicate the position of the eyebrows.
3. Now, we will add two new horizontal lines, equally distanced, that will position the bottom of the nose and the bottom of the chin.
4. The last step is to draw two new horizontal lines below the eyebrows and nose lines to position the eyes and the mouth. These are at the first third below the initial lines.
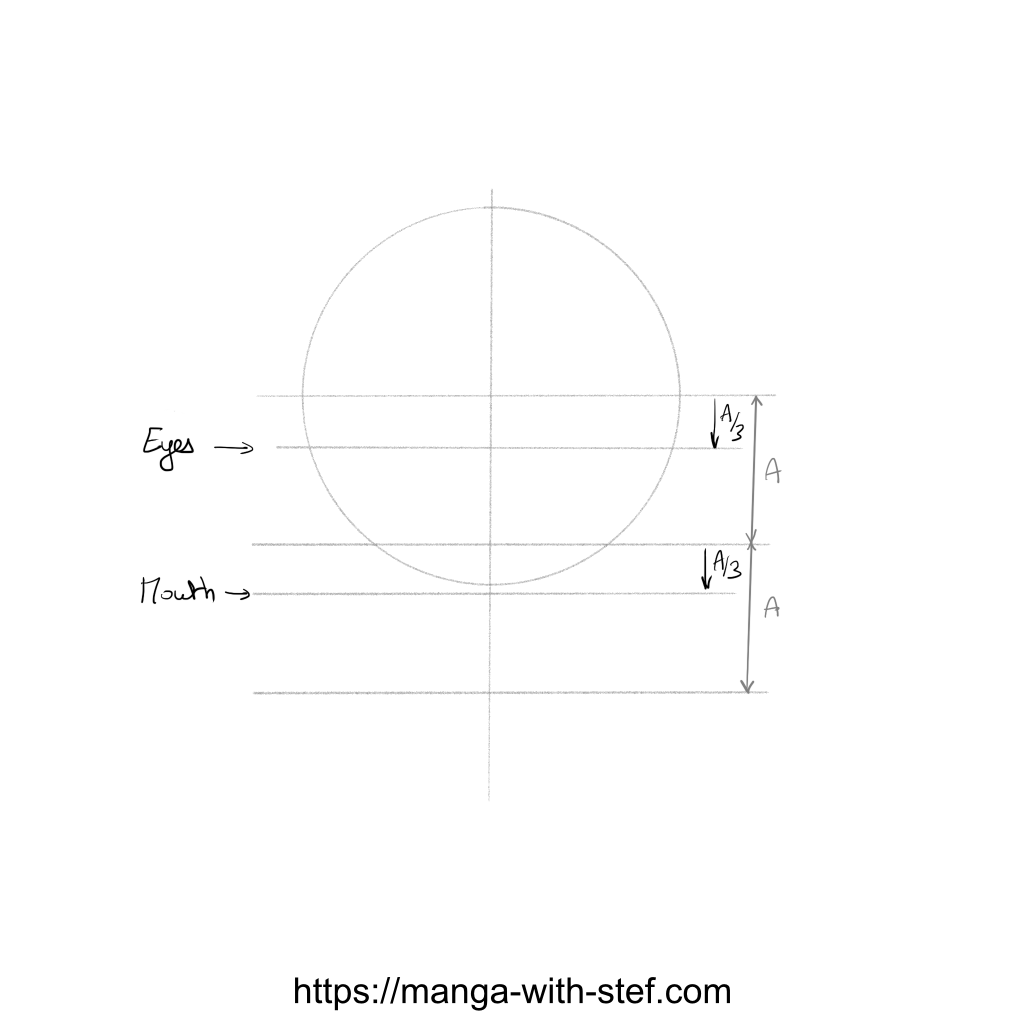
The final result should be as follows:
Step 2 – Sketching our character
Drawing the outline of the head
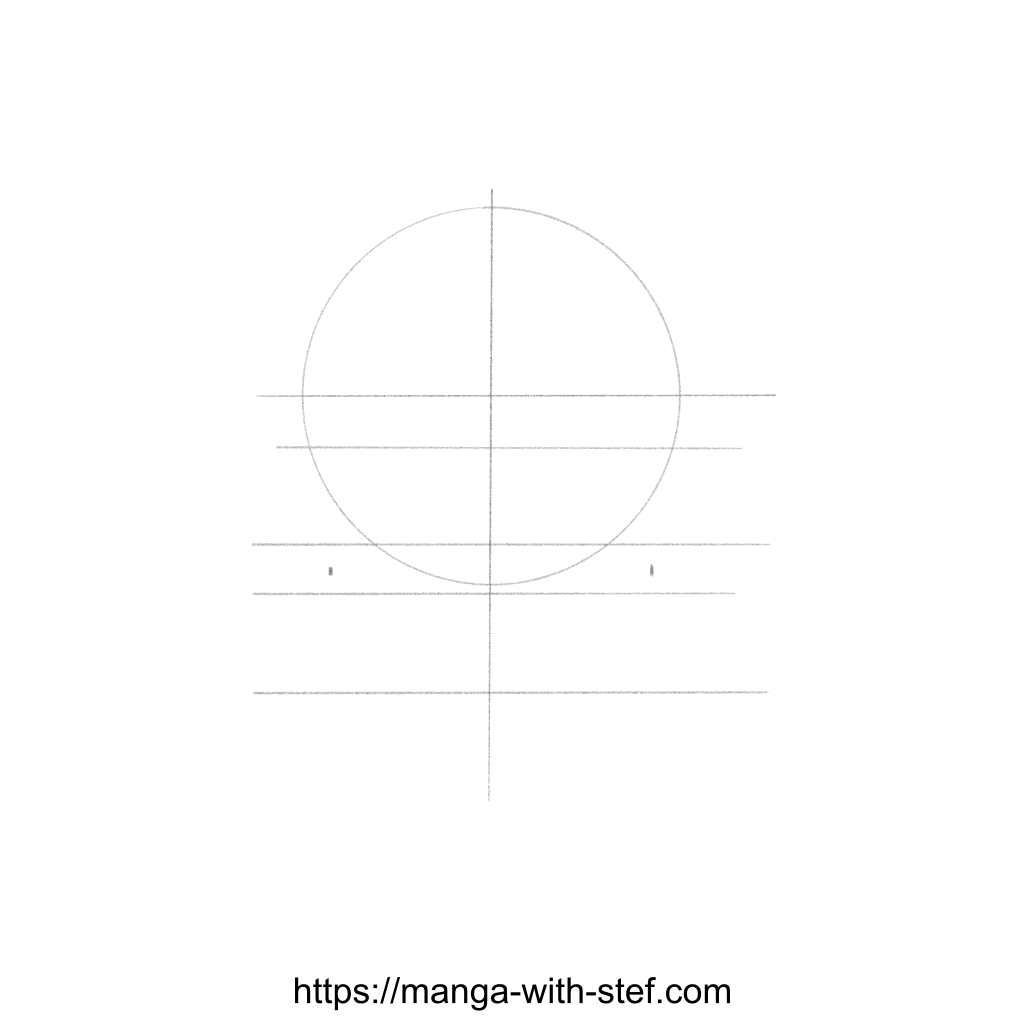
Now that we have our drawing guidelines, we will draw the outline of the face of our character.
We will start with the outline of the jaw. To do so we will add two symmetrical marks between the guide lines of the nose and the mouth. You can modify the distance between these marks and the horizontal axis to create stronger or weaker jaws. For a standard face, the best is to be slightly offset inward from the side of the circle.
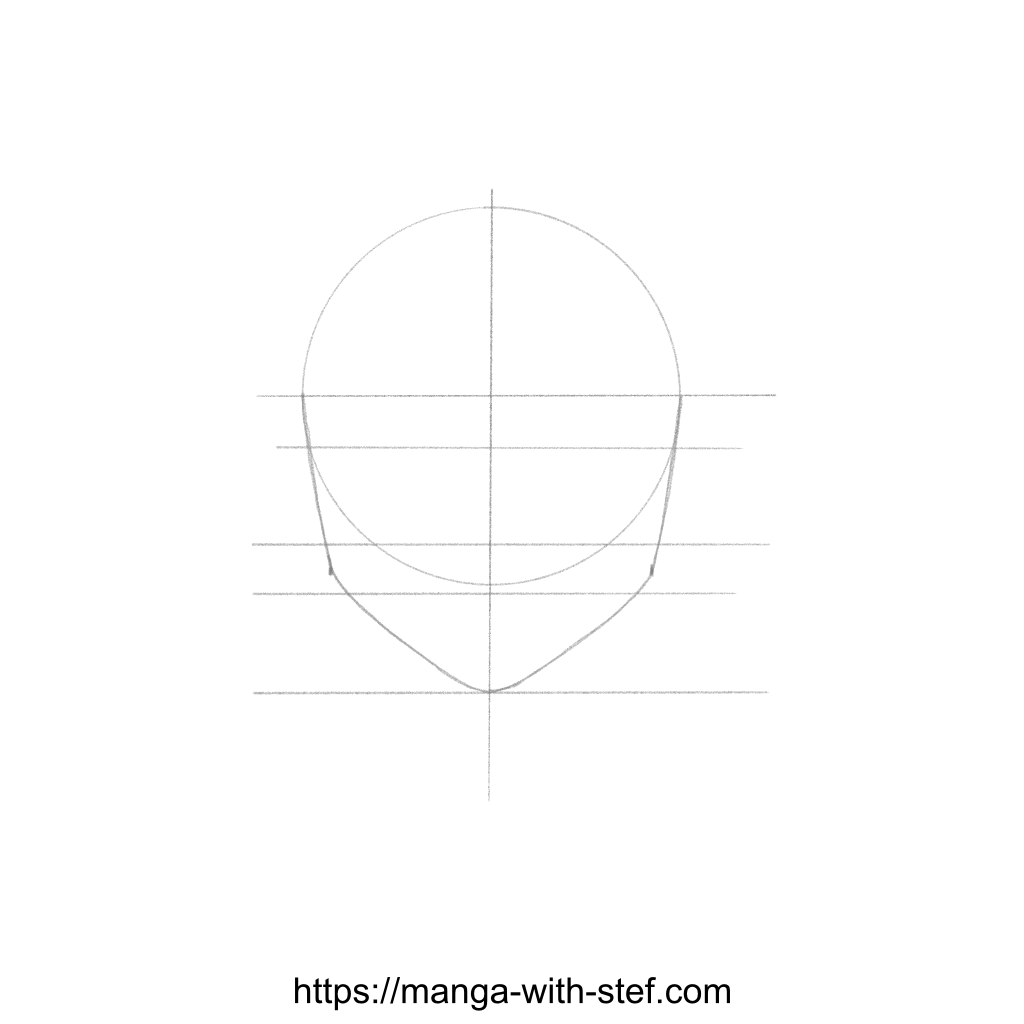
Next we draw the side of the head and jaw, starting from the borders of the circle on the eyebrow guide line up to the marks we have just made.
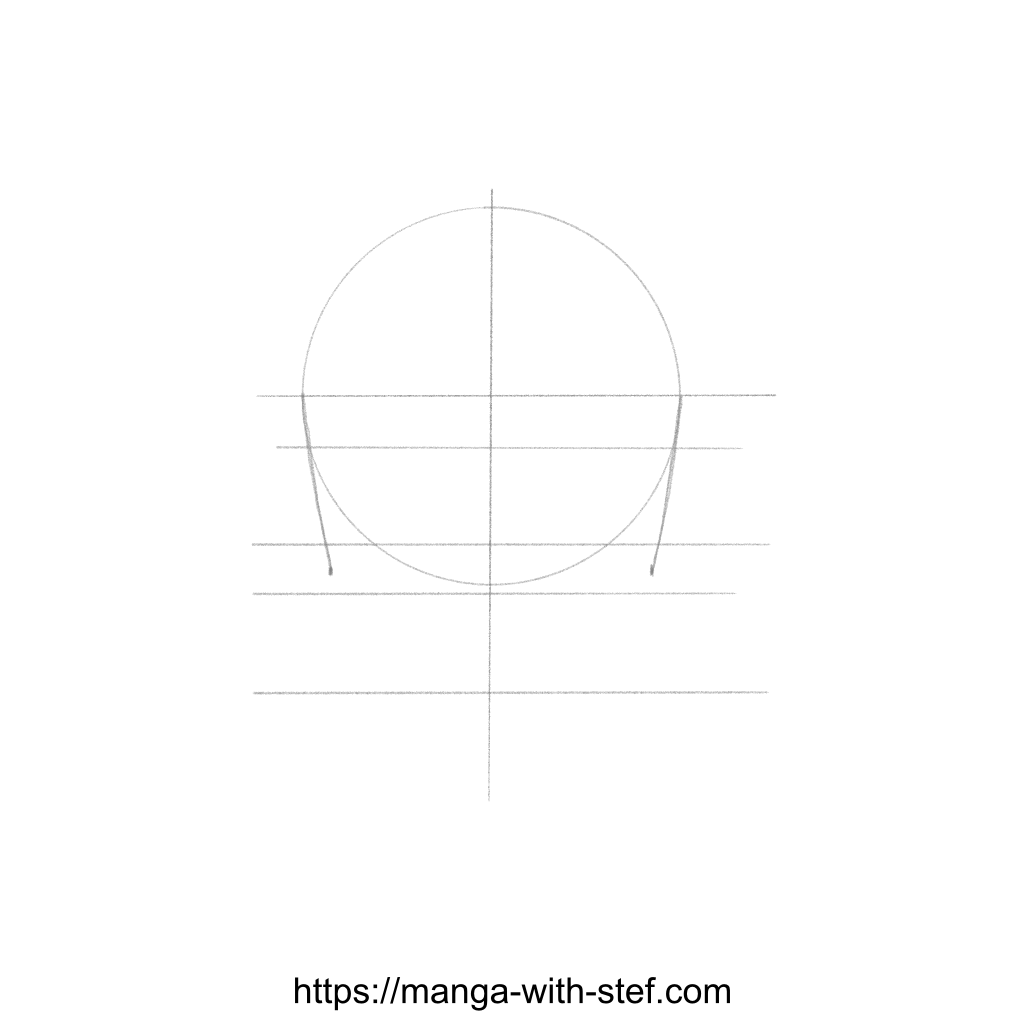
And then we join these two lines at the bottom of the chin. Take care to round the chin. You can also vary the width of the chin, wider chin leading to stronger looking jaws.
Adding the eyes
Next, we will draw the eyes of our character.
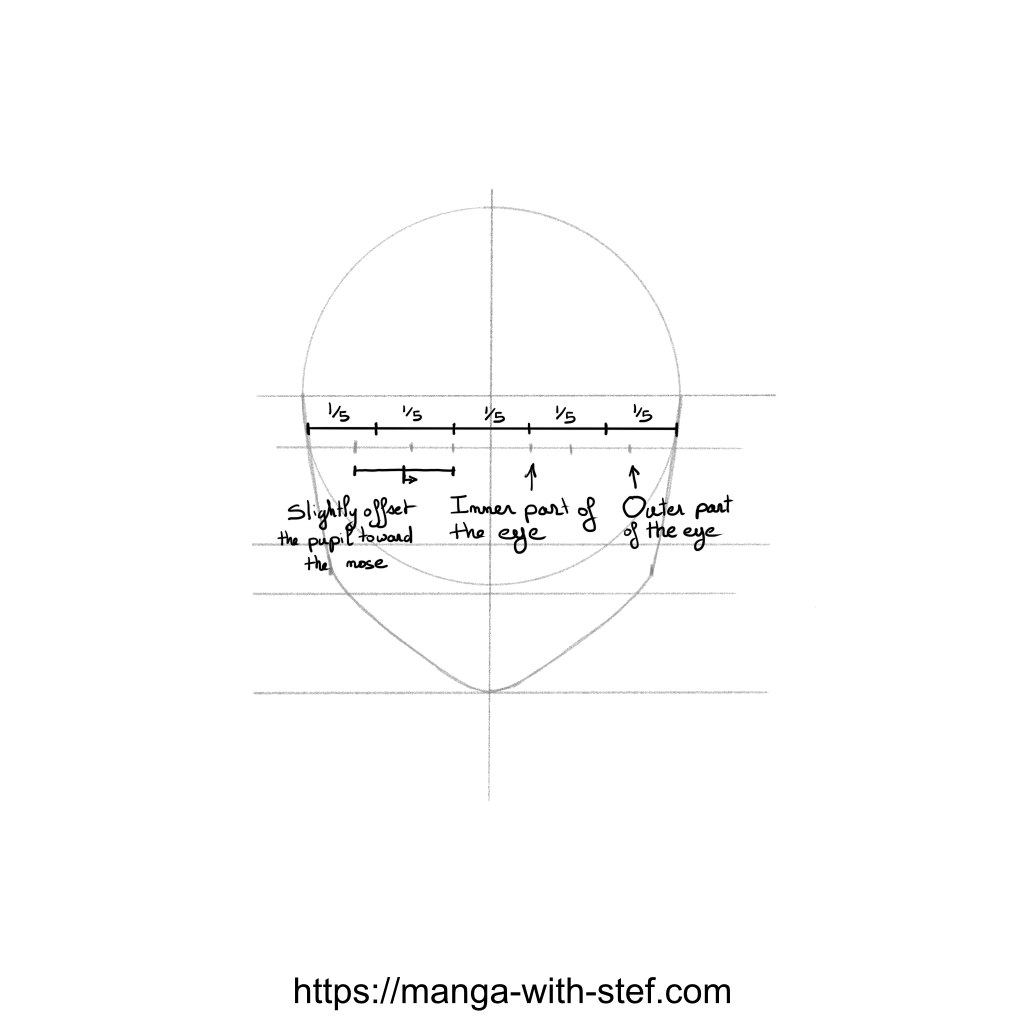
Again, to ensure that our drawing is symmetric and good looking, we will add some marks for the inner and outer parts of the eyes, and for the pupils. These marks will be positioned on the line of the eyes.
In standard anatomy, the width of an eye is about 1/5th of the width of the head. Eyes themselves are spaced by about the width of the eyes.
I would advise to keep that that distance of 1/5th of the width of the head between the eyes to avoid your character looking awkward or cross eyed.
For a shōnen/shōjo manga style character, though, the width of the eyes can be slightly larger than the 1/5th of the width of the head. This is the example I will use myself.
Finally, the pupils shall be positioned slightly offset toward the centre of the face. Note that if the pupils are too close to each other, or too far apart, your character will look like having strabismus, therefore take care if this isn’t your intent. It is easier getting this wrong than right.
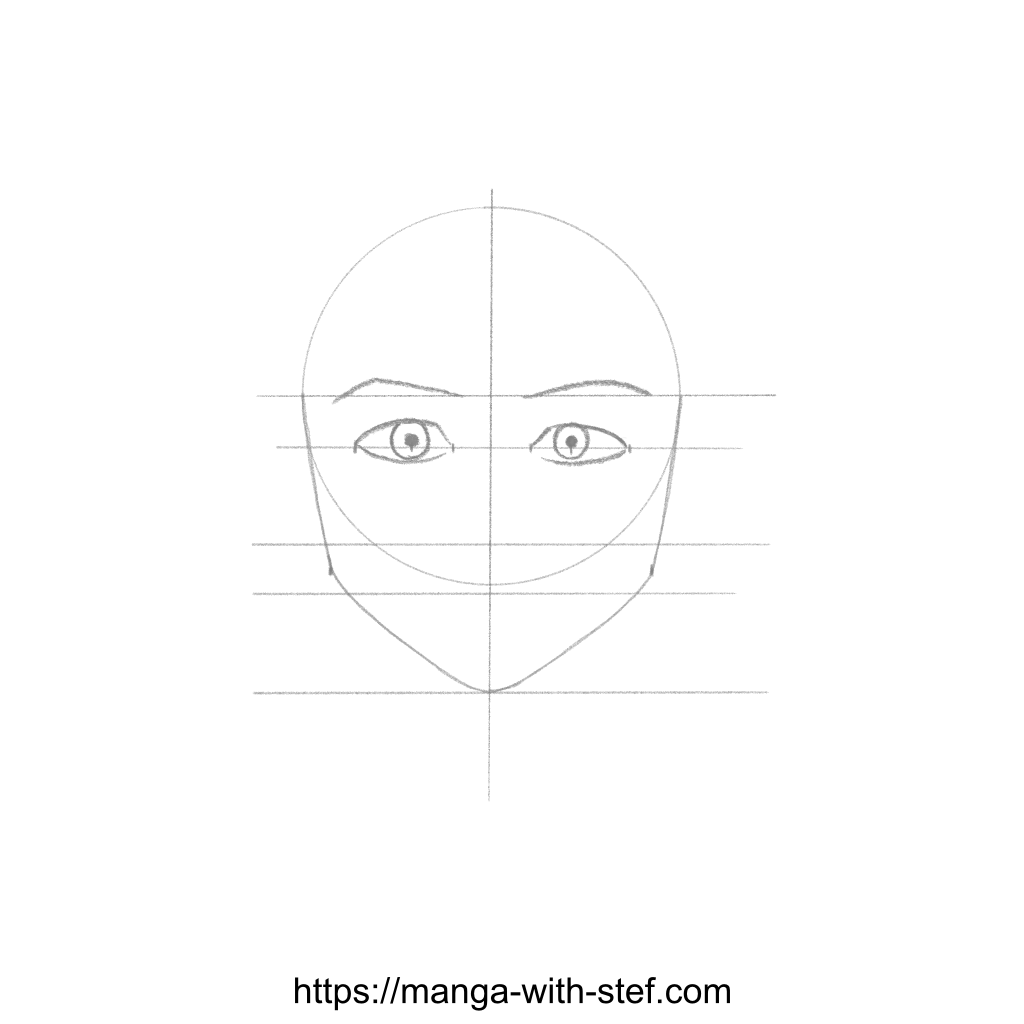
Now that we have identified the key characteristics of the eyes, let’s draw the eyes themselves.
We will start by drawing the pupils with an oval centred around our mark.
Then we will draw the upper and lower eye lids. They both extend between the inner and outer eye marks. Realistic looking eyes will be closely wrapping the pupil, while manga style eyes will be bigger.
And finally, we will add the eyebrows over the eyes. They will star from the inner part of the eye and arch over the eyelid. Eyebrows are generally wider than the eyes.
I provide below two examples, the first with realistic looking eyes, and the second with manga style eyes.

Drawing the nose, mouth, ears and neck
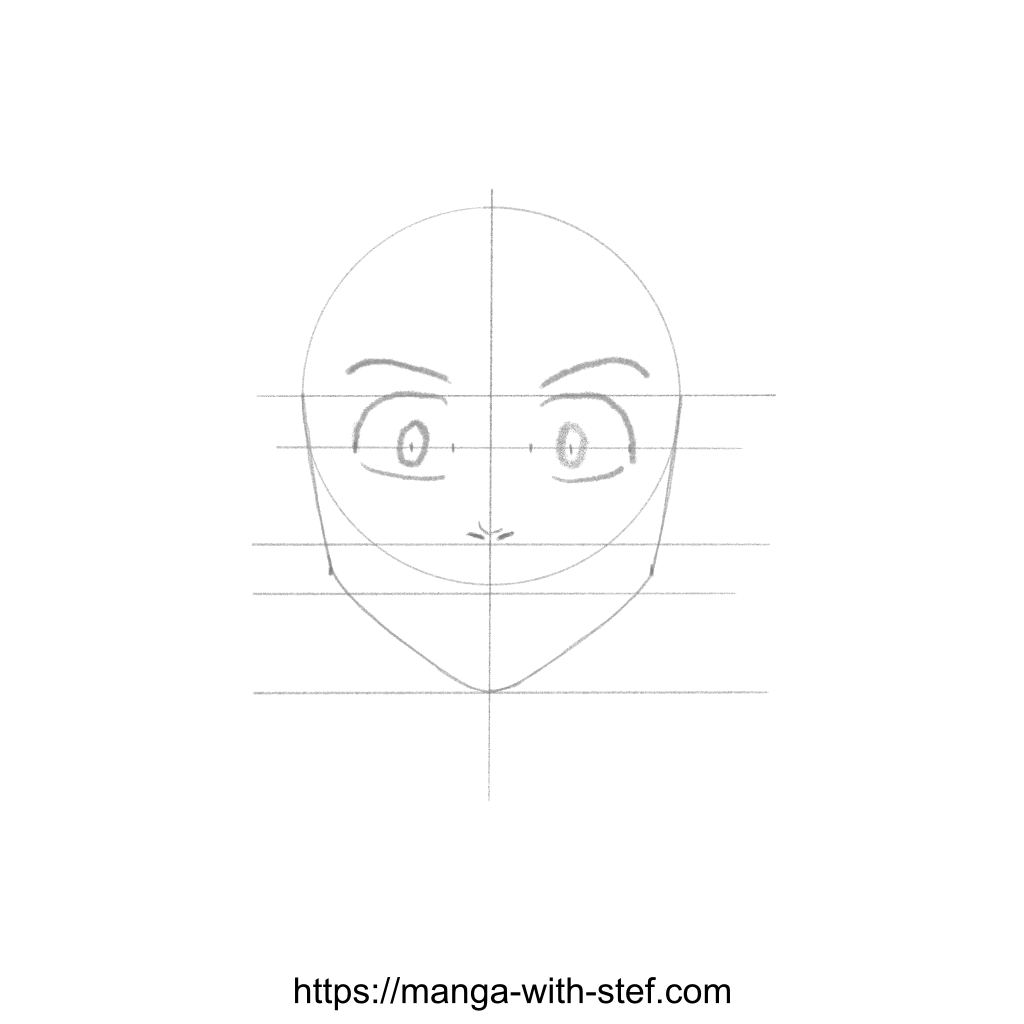
After the eyes, we will complete the features of the face with the nose, the eyes, the ears and the neck.
The nose extends between the eyebrows and the nose line. In manga, for a character facing forward, artists generally limit the nose to a few strokes to mark the bottom or the nostrils.
Then the mouth will be a simple line on the mouth line below the nose.
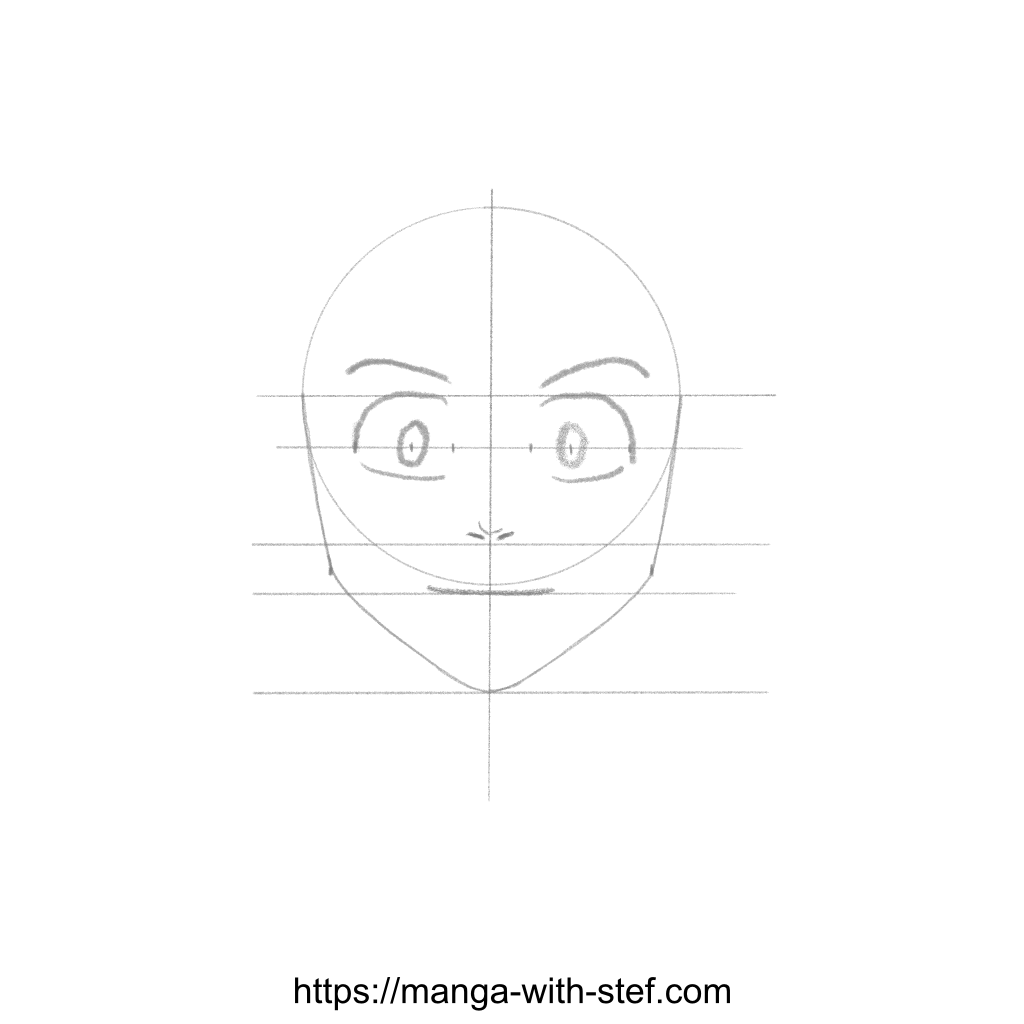
After that, the ears extend on both side of the head between the eyebrow line and the nose line.
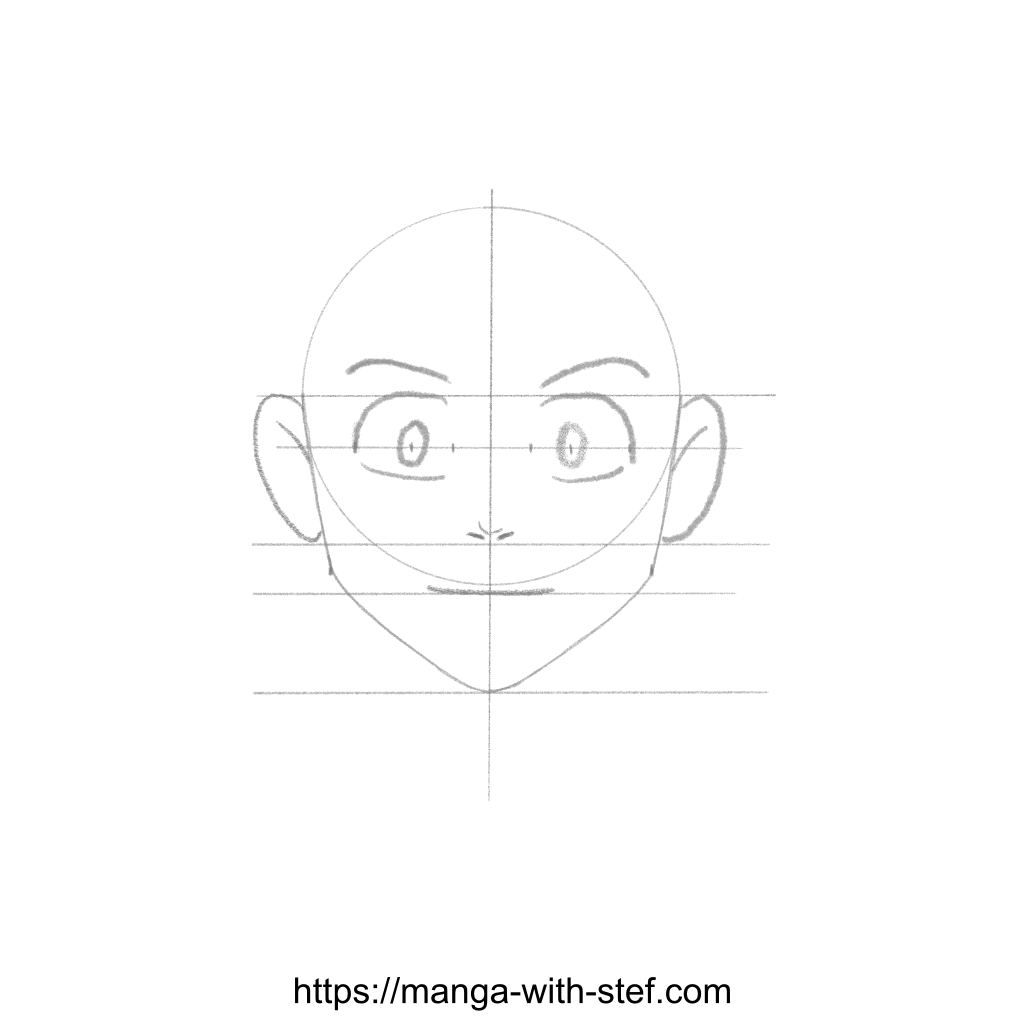
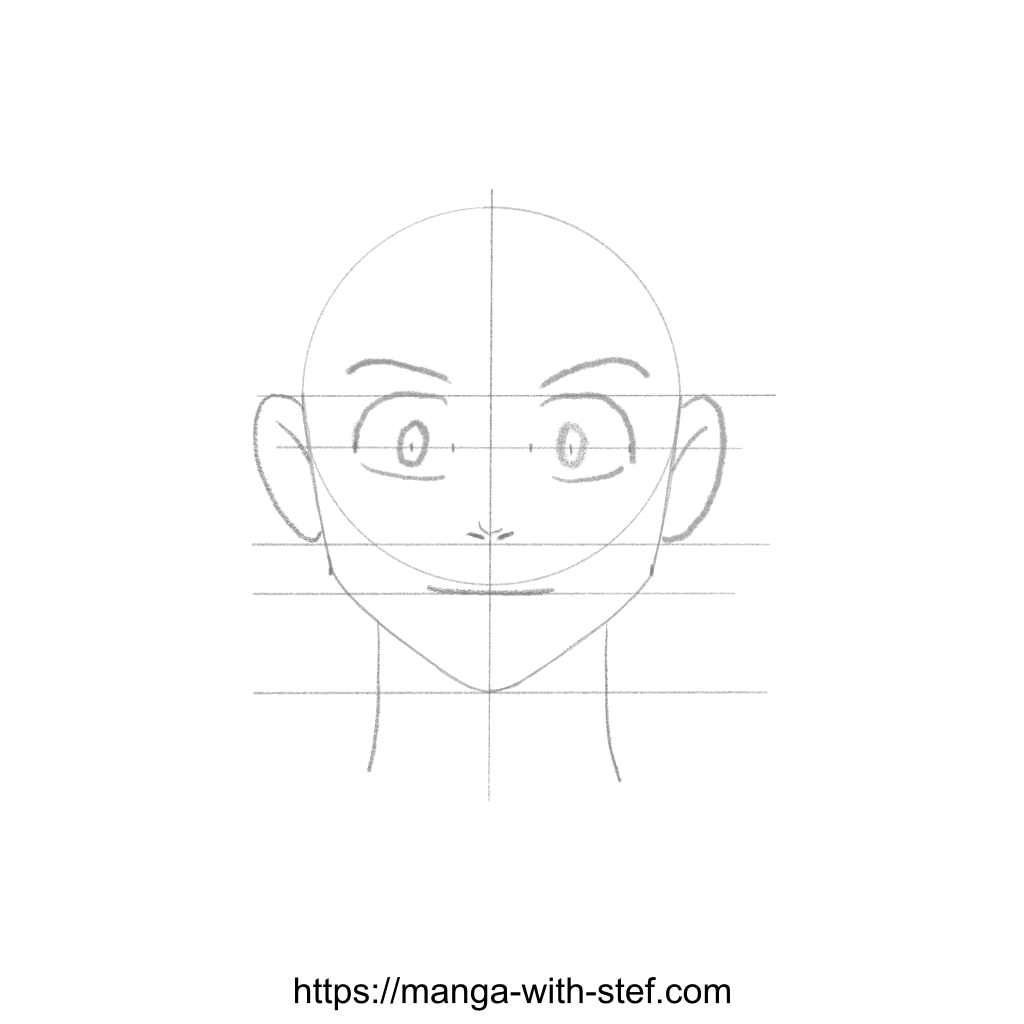
Finally, the neck will extend below the chin. You can use wider neck thickness to express strength.
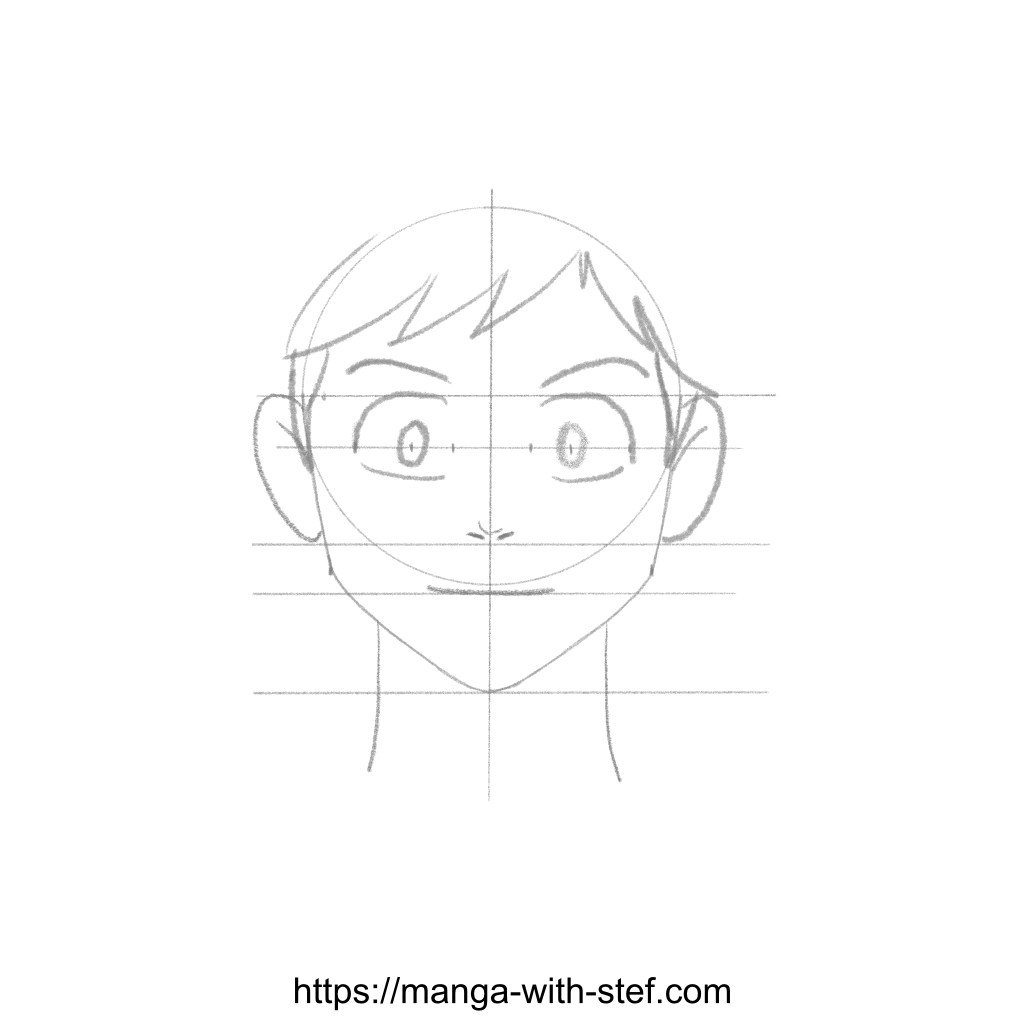
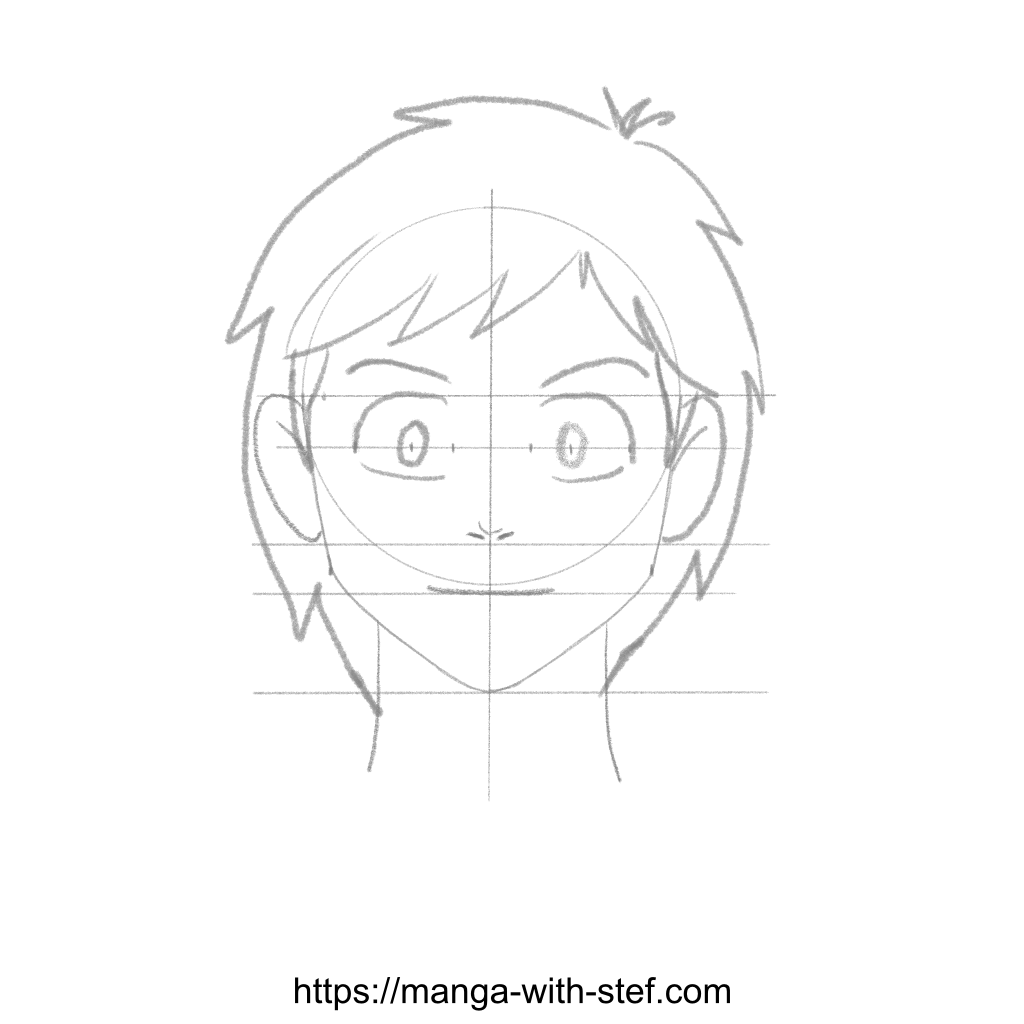
Drawing the hair
The final part will be the drawing of the hair.
Hair are generally drawn in two steps. First the fringe and sideburn, and then the outer outline of the hair. Here is a quick example.
Step 3 – Inking and shading our character
To finalise our drawing, we now just have to ink it, and then to shade it.
For the inking we will carefully draw over our sketch, trying to set the final lines. Don’t forget to add details such as the sparks in the eyes according to the lighting.
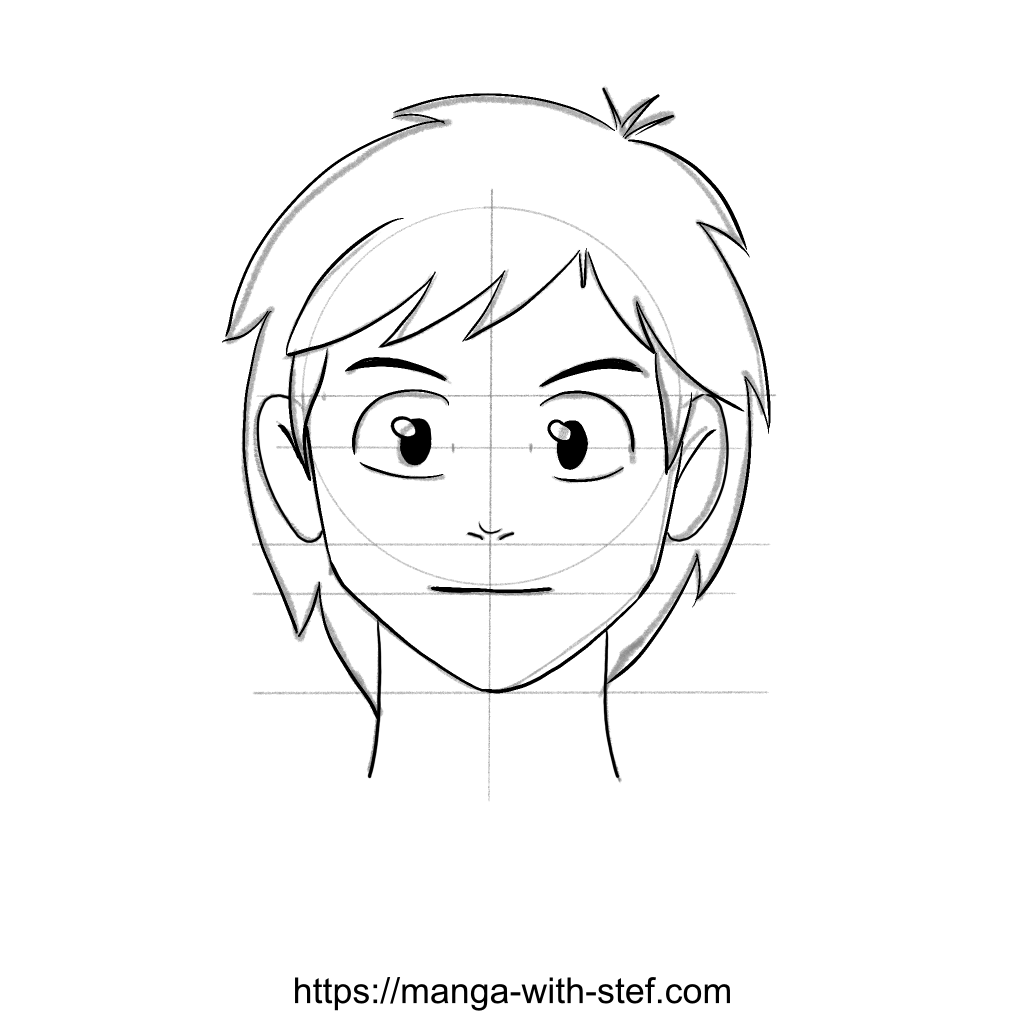
Once the ink is dry, you can erase your sketch.
Then, the last stage will be to ink your drawing. There are different techniques for the shading. Here I give an example of the use of screen tones, but you can colour it with paint, watercolour, markers or colour pencils. And you can also use hatching techniques.
If you are drawing digitally, I have made a collection of screen tones available for download.
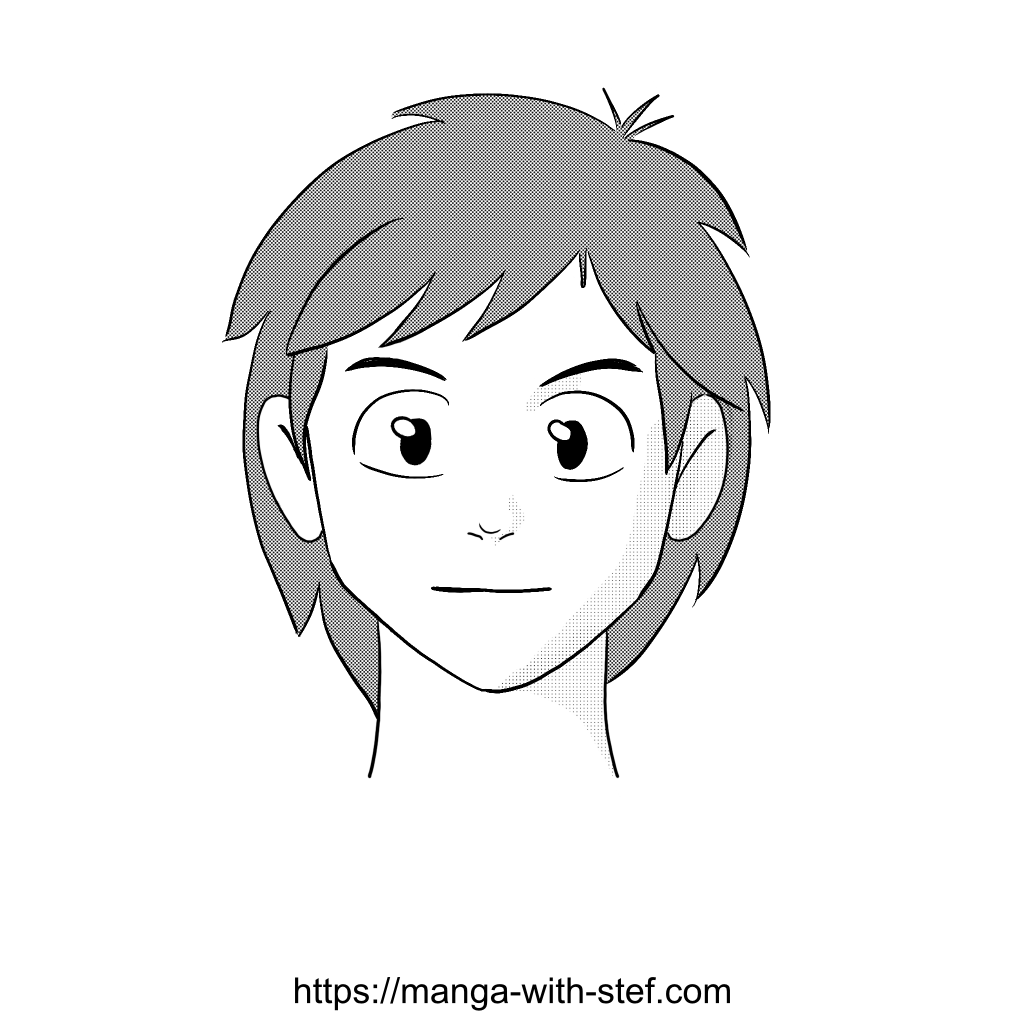
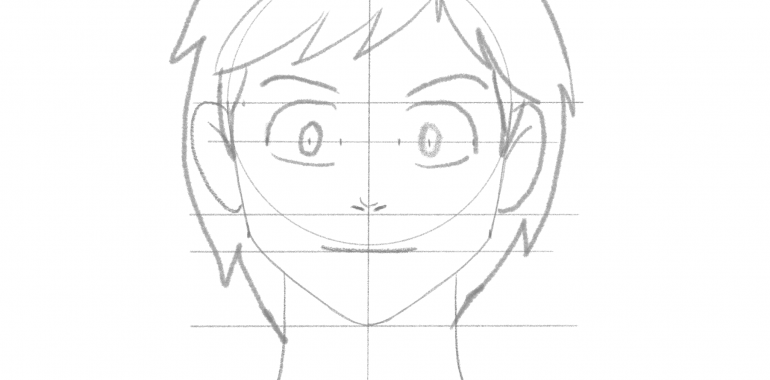
And here it is, our drawing is complete.
Of course, there is far more to learn about the techniques to draw eyes, nose, mouth and hair. These will be the subject of additional articles.
Note you can also find a videos on manga drawing my YouTube channel and on the video part of my blog.
You might also be interested by the following articles:
Here it is for this article. Do not hesitate to leave comments or ask questions.