The Manga Page’s Rough Sketch
The Manga Page’s Rough Sketch
Now that you have your manga mock-up (or ネーム nēmu) you are finally ready to draw your manga pages. The process of drawing a page goes through different steps, with the first being the rough sketch (下絵 shitae – the image below, or 下書き shitakaki – the drawing below, in Japanese).
The rough sketch of your manga page will serve as the base for your inking. It will therefore be very close to the final drawing with panels, characters, accessories, setting and dialogue bubbles.
Equipment
Paper size
It is recommended that you use large sheets of paper to do your manga page’s rough sketch. The objective is to have greater than targeted sized paper to allow adding fine details in your drawings without them getting cloudy. The page, once ready for publication, is scaled down and trimmed to fit the final manga page size (B5, around 5×7.5 inches or 11.5×18 cm).
Manga artists in Japan use B4 sheets of paper, but you can of course use A4, A3, Letter or Ledger sized paper. They will perfectly do the job.
Paper weight and pencils
You also have to be aware that there are different paper weights. The weight affects the thickness of the paper and therefore its resistance to folding and tearing. And this thickness also affects the kind of media you can use on the paper, like water colours for instance that requires heavy paper.
The paper used by Japanese manga artists weights around 135 kg, which is around 160 gsm (g/m²) or 80 lbs. The thickness of this paper makes it more fold and tear resistant than standard printing paper. This therefore makes it safer when using an eraser or moving your hands over the paper. This paper also remains thin enough to be used with light tables.
You can use lighter paper of course but you will have to be cautious to avoid creating folds.
As said above, you will have to use heavier paper if you intend to colour your drawing using watercolour. People generally recommend paper with a weight of 250gsm (115 lbs) or more for that purpose. This will allow the paper to better absorb water without warping too much, and make it more wear resistant. This paper though isn’t suitable to be used with a light table as light might not show through.
And if you intend to colour your drawing with alcohol markers, the best is to use specific paper with a barrier. These will limit/prevent bleeding and alcohol ink overconsumption.
Drawing technique and office supplies
The pencils you will use depend on the techniques you plan to apply.
Not including digital techniques, manga artists generally use one of the following techniques for their manga page’s rough sketch:
- Inking over sketch
- or inking over non-photo blue sketch
- or inking using a light table
Here is how these techniques work and the supplies they require.
Inking over sketch
Inking over sketch basically involves sketching your page, and then inking directly over your sketch. You then erase your sketch before the page is being finalised. The objective is to avoid cleaning of the sketch once it has been digitised.
This technique requires using light sketch strokes to ease the erasing. Pencils used will be standard graphite pencils or technical pencils with H, HB or B leads.
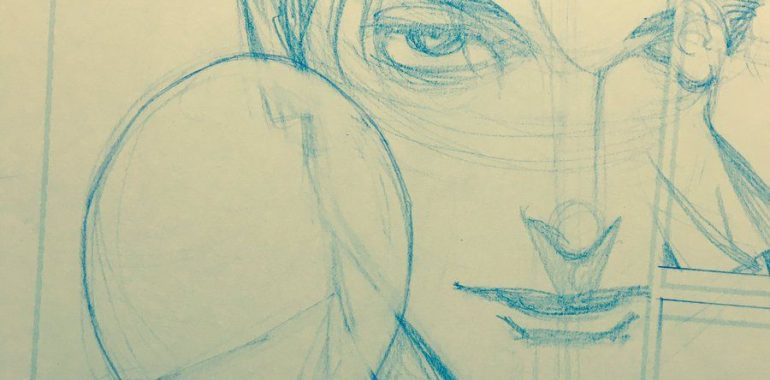
Inking over non-photo blue sketch
Inkink over non-photo blue sketch involves using a specific blue (sometimes red) pencil to draw your sketch. Then do the inking and colouring over that sketch. The difference with the previous technique is that you don’t need to erase the sketch as scanners should not pick the blue colour during the digitisation phase. Again the purpose is to prevent cleaning tasks once the drawing has been digitised, but it might not be as effective as the first technique.
You can quite easily find some of these non-photo blue pencils in art stores, or use light blue or red coloured pencils. Then you will have to calibrate your scanner software to optimise digitisation.
Inking using a light table
The main purpose of this technique is to preserve your rough sketch after the inking.
You need here to have a light table. You then need to overlay a new sheet of paper over the sheet of paper containing your rough sketch. Then you do the inking on that new overlaid sheet of paper, tracing the sketch which shows through thanks to the light table.
Here you are more free to use the pencils you like to do your sketch as you will not be constrained to erase it.
Other supplies
In addition to that, you will also need a ruler to trace panel borders.
And you might need some rubbers, like kneaded and plastic erasers, or eraser pen for precision work.
The rough sketch of your manga pages
The rough sketch of your manga pages will be done into two steps. First, you will sketch your panels, then sketch their content.
Sketching Panels
Nothing fancy here, the objective is just to define the space that your drawings will have.
Just draw your panels using a pencil and a ruler. Do not worry if you go over board, as you will ink them afterwards.
If you did not go through a mockup stage, I would advise you to read the instructions I provide on panels’ design in the mockup article. How you can use panel size to give more focus or show some details. Or how you can vary panel borders and gaps to help readers follow the flow of your story.
One Piece (c) Eiichiro Oda / SHUEISHA
Sketching panels’ content
The panels being in place, you can now move to sketching the panels’ content itself. The rough sketch shall be as close to the final drawing as possible. It does not need to be perfectly clean, but you should be able to easily trace your final drawing from it using ink.
Again, if you did not go through the mockup stage then you will have to work here on finding the best framing for your scenes. The best postures and expressions for your characters. Then you will have to draw your text bubbles. And finally you will then add required details for your characters and settings, without forgetting onomatopoeias (sound effects).
Pro tips
Here are a few tips I gathered from looking at how professional mangaka work:
Prioritise the broader view before the details
When working under time constraint for the publication of your pages it can be interesting to prioritise your work. Focus first on characters and their emotions, text bubbles, and also settings when they are key for the understanding of the scene. Leave the nice to have parts for a second pass.
The objective is before all to make sure that you can deliver what you are expected to deliver. And this, without compromising your story.
If you have time then extra focus can be given to add more details to the different panels. This is where for instance professional manga artists will delegate the work to their assistants.
Find inspiration
Do not hesitate to find inspiration through picture banks, magazines or other comics.
Many professional artists build some kind of database of reference images they like and plan to use in their manga. It can settings, impactful framing, character showing specific emotions…
The border of the panel isn’t the limit
Do not fear drawing outside of your panels, the panel borders shall not be a restriction. This can help with keeping proportions and fluidity of the drawings.
For instance, you might get better proportions for a character if you draw it fully, and then erase the parts which are out of the bounds of the panel.
And keeping the parts outside of the panel can be part of your art style and a way to give more space to your content, or to highlight elements. But if you do so, use it consistently throughout your manga. If you do it just once then it will look strange for your readers. They will think that you lacked space, or that you tested something.
—
Do not hesitate if you have comments or question. These will help improving the blog.
See you,
Stef