Introduction to Perspective for Manga Artists
Introduction to Perspective for Manga Artists
Being able to use perspective into your art is the best way to give your drawings a sense of 3-dimensionality.
What is perspective
Perspective is an optical effect. It allows a viewer to perceive the depth and distance of the different elements of he observes. Without perspective, our environment would look flat.
Knowing how perspective works is therefore important for a manga artist as it allows them to render more realistic scenes. It allows showing something is far or close from the reader, or that it is big or small.
Perspective materializes through a set of simple properties. They were first identified by Euclid in around 300 BC, and then further amended by many thinkers.
The properties of perspective
Here is a quick summary of these properties, we will look at some illustrations just after:
- The farther something is from us, the smaller it looks. Similarly, the closer something is from us, the bigger it looks. Let’s consider we have two elements of the same size in front of us. The element that is the farther from us will look smaller that the one closer to us. This phenomenon is called foreshortening.
- The farther a subject located under our line of sight is from us, the higher it will seem to be. And the farther a subject located above our line of sight is from us, the lower it will seem to be. Both these elements seem to converge in the distance and form a line called the horizon line. This line is at the same height as our eye line.
- Lines that are parallel between them converge at the same point at the horizon. This point is called “vanishing point”. This isn’t applicable to lines that are parallel to the line passing by our two eyes, though. These lines will never seem to converge in our field of view.
Illustration of the perspective properties
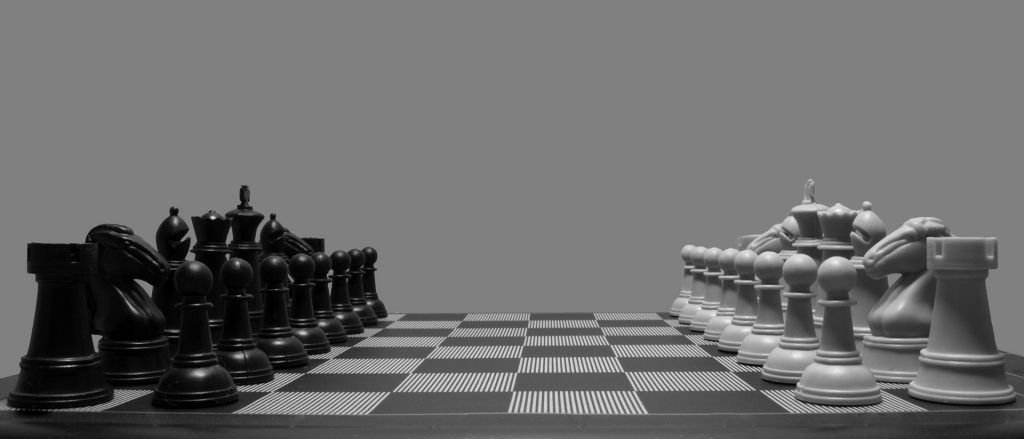
The chess image below is a good illustration of the first principle above. You can see as the farther the pawns are on the chessboard, the smaller they look. Because we know the pawns all have the same height we can say that the bigger ones are close to us, and that the smaller ones are away from us.
The next image illustrates the second principle. You can see how the farther elements are on the ground, the higher up they are on the image. And in the same way, the farther elements are on the ceiling, the lower they get. And you can again see the effect of the first principle, with elements looking smaller the farther they are from us.
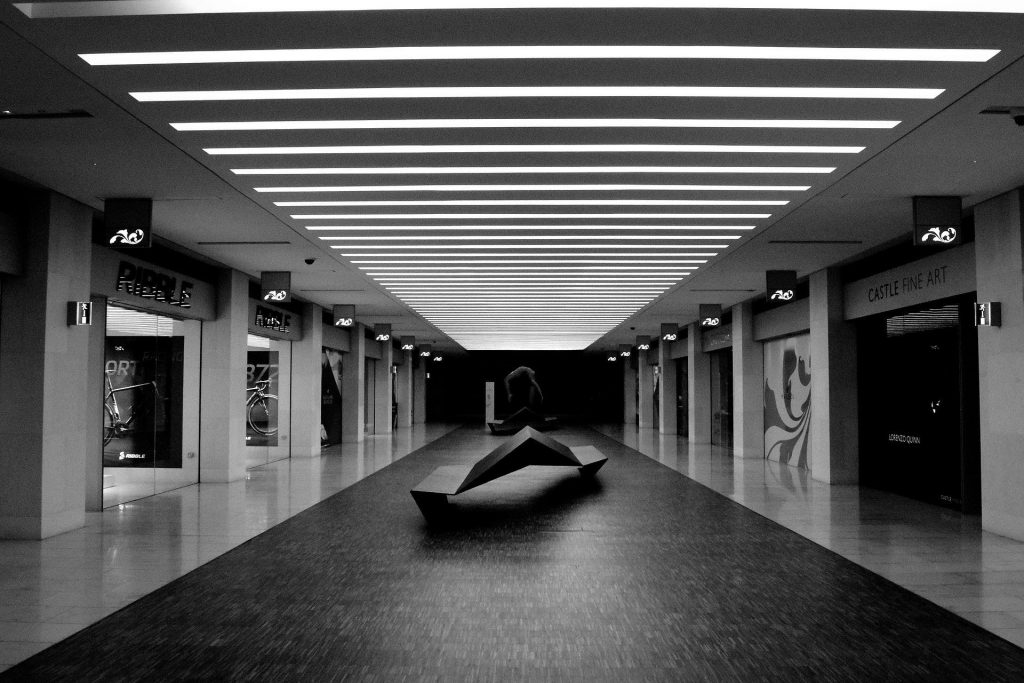
Similarly, lights on the ceiling appear to be going down in the picture the farther they are.
We can see also that the ground and the ceiling appear to converge and form a line: the horizon line.
This last picture illustrates how the rails, which we know to be parallel, are converging at the horizon. We can also see that the ties/sleepers which are parallel to our eyes don’t seem to be converging or diverging. That effect can also be spotted in the image above with the lights on the ceiling.

In addition, the horizon line at the convergence between the ground below the eye line and the sky above it.
How to use perspective
Perspective is used as to improve your the composition of your panels.
As stated in the introduction, perspective will first allow you to provide the sensation of depth and distance. This can be used both with characters, like in a crowd, and settings.
Another way to use perspective is to enforce the point of view of some characters. For instance to show that a character is watching other characters from above. Or that this character is being dwarfed by a huge monument.
Now, let’s discover some of the most common perspective techniques.
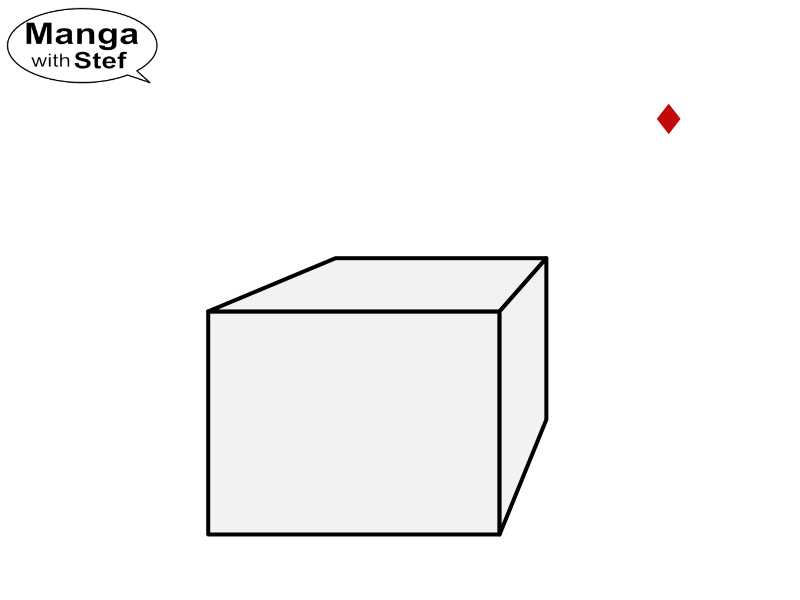
False or parallel perspective
False perspective is a mechanism where you add depth to a scene, but this without following the principle of perspective according to which parallel lines at an angle from the viewer converge at the horizon.
The sensation of depth is therefore simply given by using parallelograms to illustrate depth, without caring for convergence and foreshortening.
This technique is a good way to start to add a touch of realism/plausibility to a scene. But you should limit its use to scenes with a limited depth, like a few feet or meters, where perspective is not so obvious. Used on scenes with more depth it will start to look strange or even totally weird. This is due to the lack of foreshortening that, given elements would keep their size even far away, would give viewers the impression that they are getting bigger and bigger.
You might have seen that technique being used in many 2D video games to make them seem kind of 3D. This works in that context as the depth of the visible scene is limited to the size of the screen where effect of perspective is not so much obvious in the normal world.
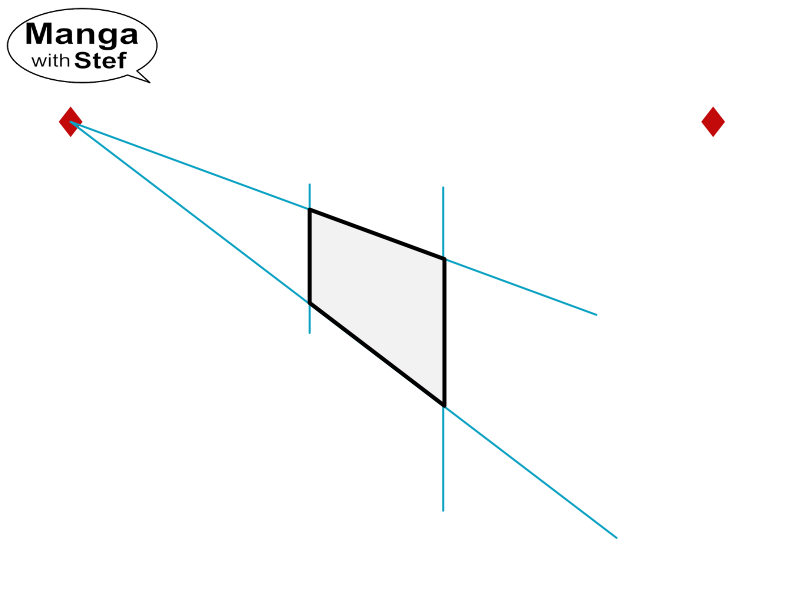
One point perspective
If you want to go a step further, with more realistic looking scenes, then you have to learn the 1-point and the 2-point perspective techniques. But don’t worry, there are not so complicated.
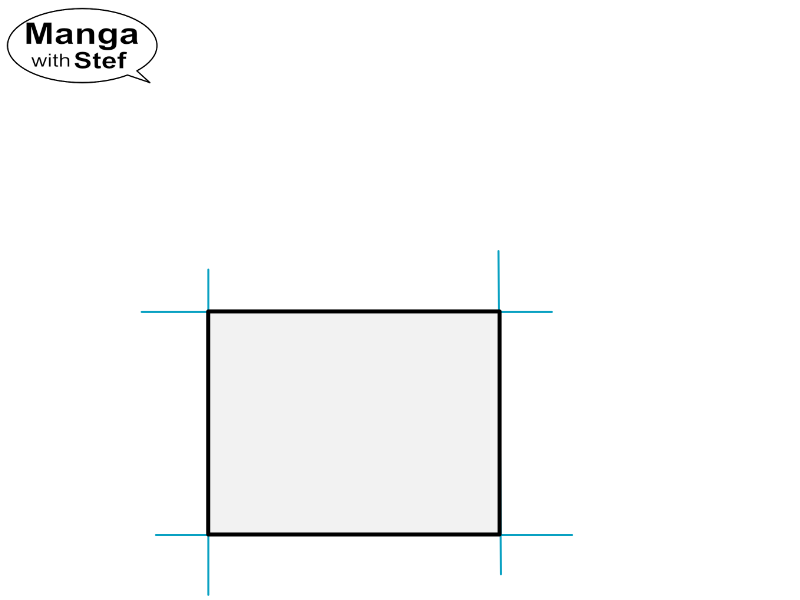
The 1-point perspective technique is to be used for elements that are directly facing or perpendicular to the viewer. This can be for instance a character facing the viewer, or a car parked in front of the viewer…
A cube used as a bounding box for that element facing the viewer would have the lines of its front and back faces parallel to the eyes of the viewer. These lines would therefore not be impacted by the perspective as per the 3rd principle we have seen earlier. Therefore only the edges of the top, left, right and bottom faces would be impacted, and as all these lines being parallel they would converge at the same vanishing point according to the 3rd principle again.

As you can see, the technique is not complicated. You can exercise yourself by positioning the front face of the cube at different locations around or overlapping the vanishing point. You should see that the best results are obtained when the cube is not so far from the vanishing point. The farther the cube will be from that point, the more deformed it will look.
The major complexity of the 1-point perspective technique is to properly set the limit of the depth of the object to avoid it looking too short or too long. Again, exercise yourself to see how the position of the back of the cube impacts its look to get the feel of when it looks good and when it doesn’t. There are technique to set the depth more specifically, I will address these in a future article for more advanced perspective drawing.
Two-point perspective
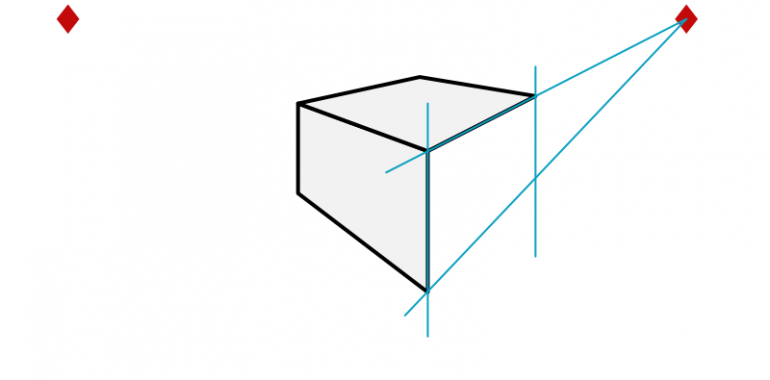
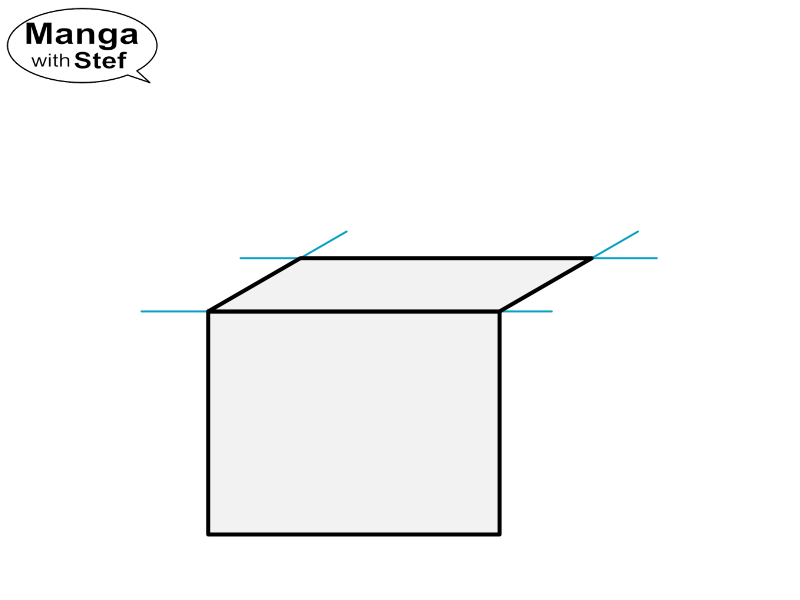
The 2-point perspective is similar to the 1-point perspective, but it allows to draw elements that are at an angle from the viewer.
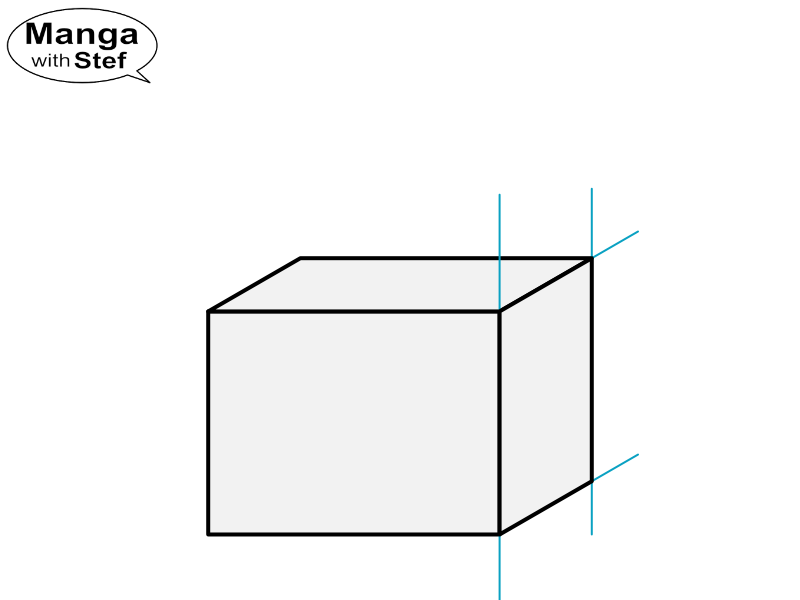
As the name says, this perspective uses two vanishing points. These two vanishing points are located on the same horizon line. The first point will influence horizontal edges that go left to right, and the second vanishing point will influence the horizontal edges that go from front to back. This perspective does not impact vertical edges which remain aligned with the vertical axis of the page.
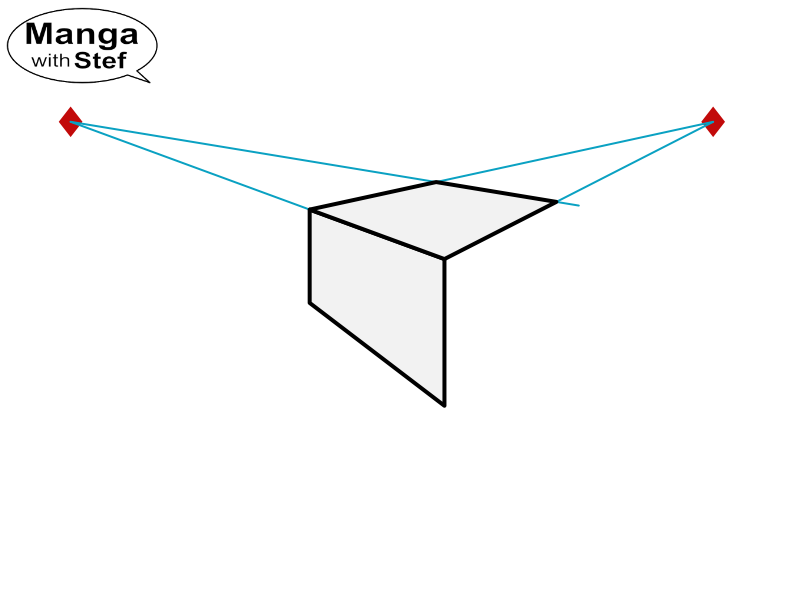
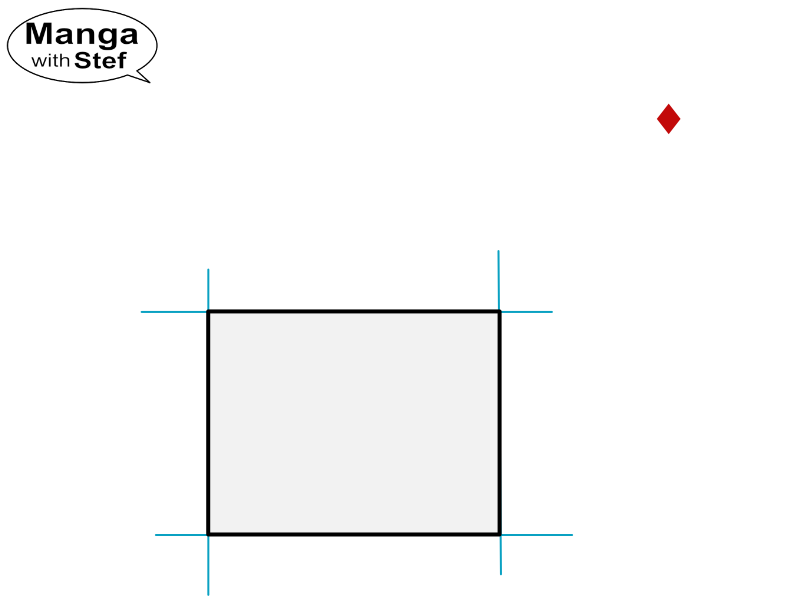
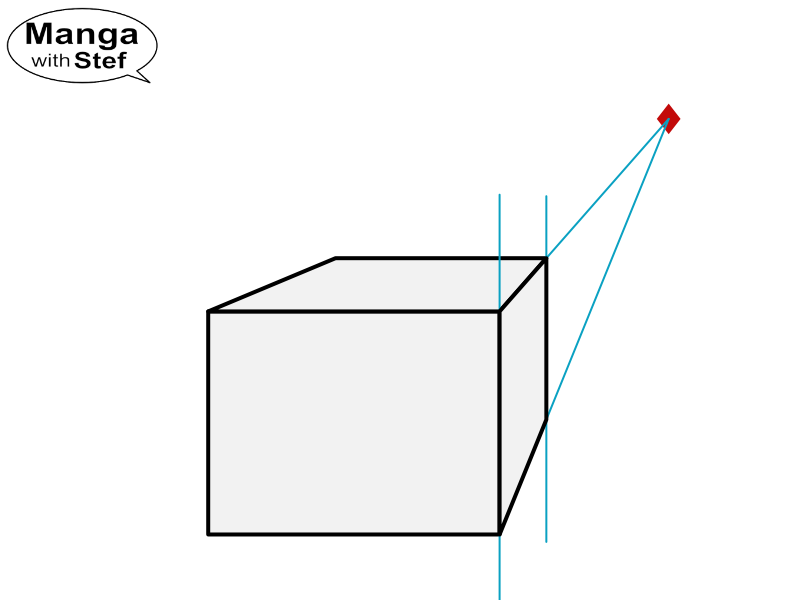
The main complexity of the 2-point perspective is to position the vanishing points so that the perspective effect doesn’t look too exaggerated. If you put the vanishing points too close the one from the other, your subjects will look like squashed horizontally. And if you set them too far apart, it will look squashed vertically.
Again, exercise with different position of the front face around the first vanishing point to get the feel of the technique and see in what area that cube looks the best.
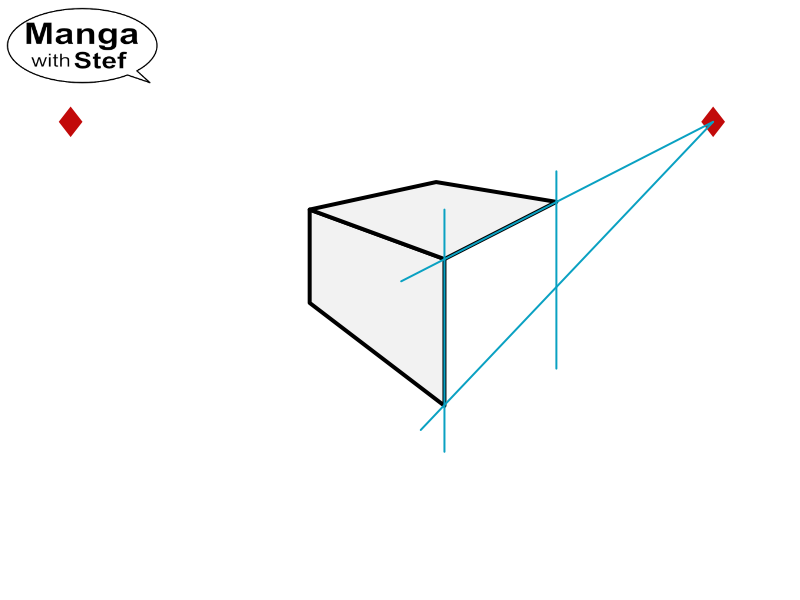
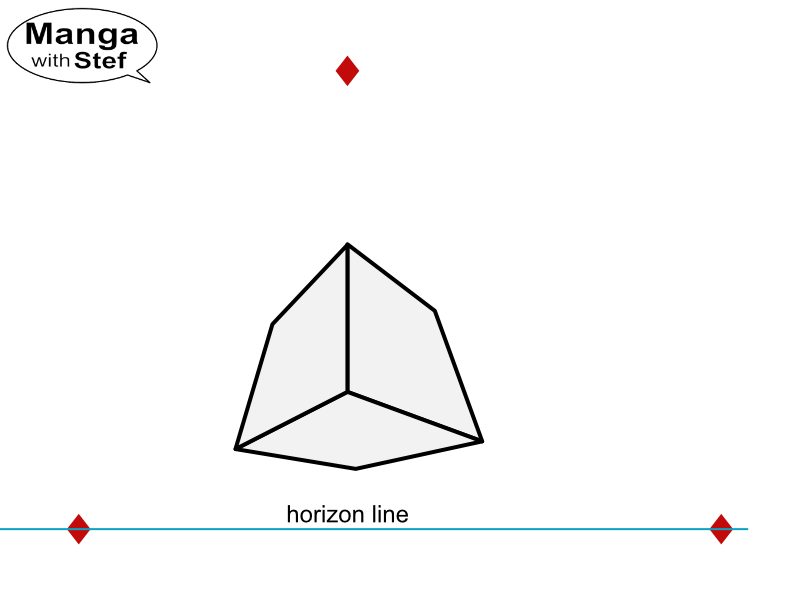
Three-point perspective
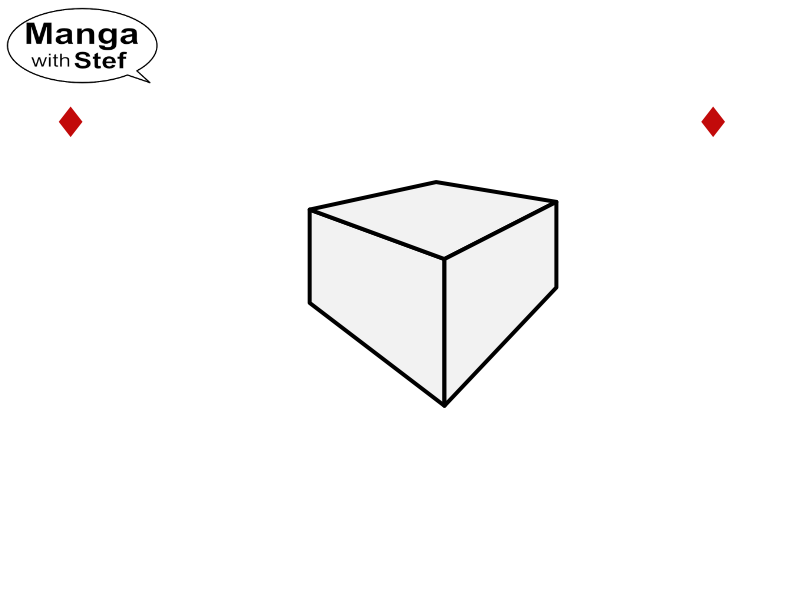
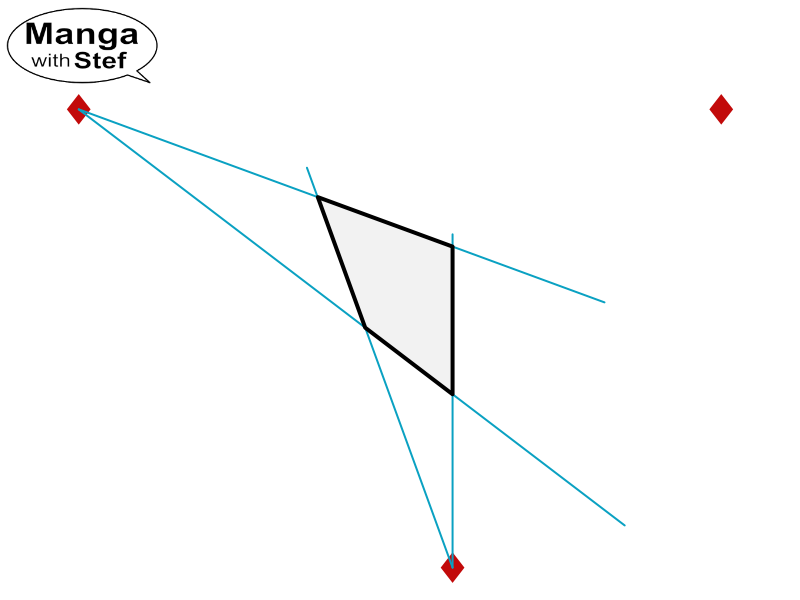
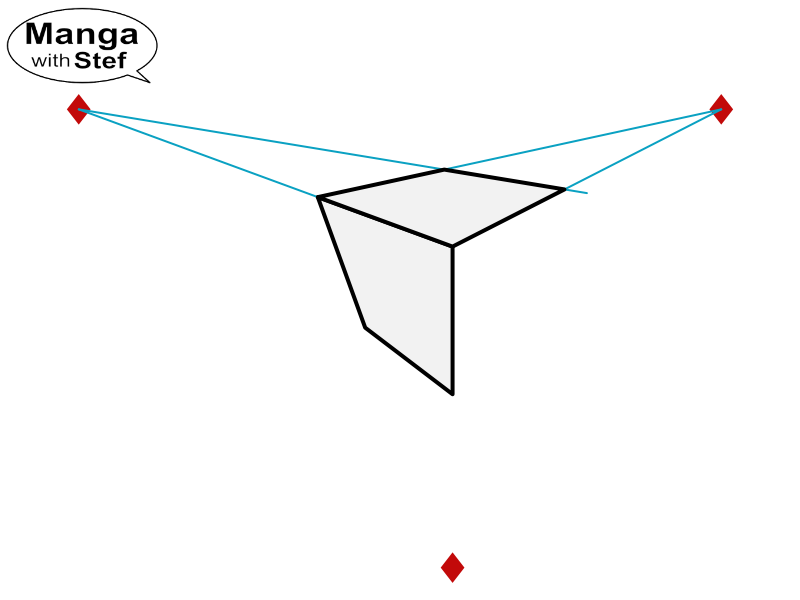
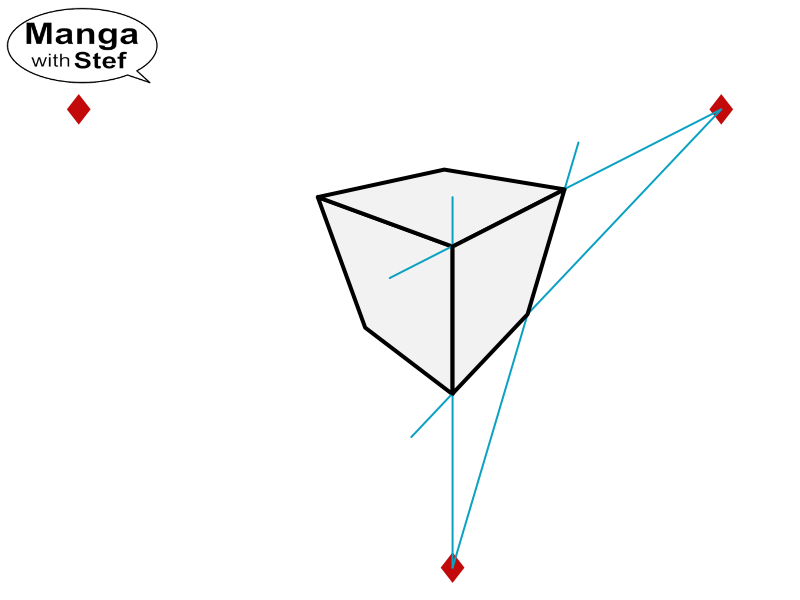
The 3-point perspective extends the 1- and 2-point perspectives by adding a vanishing point that will influence vertical lines. In this case the vertical lines will no longer be parallel to the vertical axis of the page, but will point toward that third vanishing point.
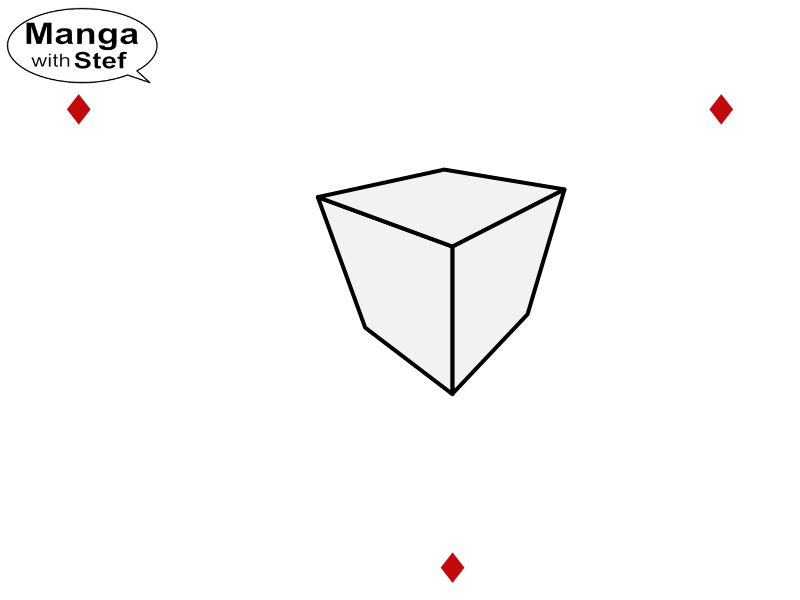
You can use this perspective to give the impression:
- that something is smaller than your character/reader, or that your character/reader looks at it from above,
- or that something is taller than your character/reader, or that your character/reader is looking at it from below.
In the first case, you should position the third vanishing point below the horizon line as pictured below. And in the second one, you will position it above the horizon line.
Summary
Perspective allows to render the elements you draw more realistic. We have seen 4 techniques that we can use for different purposes:
- You can use false perspective to draw scenes with limited depth of field: a table in a kitchen, a bedroom, a car… These will look good using this techniques. But you have to avoid using this technique for wide angle landscapes and urban scenes.
- If your viewer is facing characters, objects or rooms, then you can use the 1-point perspective technique.
- If you have some objects or characters that are at an angle from the viewer then use the 2-point perspective technique. You can in addition give a sense of height by using a third vanishing point if you wish.
- Note that you can use the 1-point and 2-point perspective techniques independently or in combination. You can for instance use the 1-point perspective to draw a room, and 2-point perspective to position characters or objects in that room.
- Finally, you can use the 3-point perspective to highlight the height of a character or object, and the height or altitude of the viewer in comparison.
Going beyond the cubes
You might ask yourself: “Drawing cubes is nice, but I how do I draw more complex elements?”.
If you are able to master the use of the 1-point, 2-point and 3-point perspectives and their combinations, then you should be able to draw anything you want in perspective. Exercise using different cubes as building blocks or bounding boxes for the elements and characters of your scene, each with different orientations (tip: don’t hesitate tilting the horizon to rotate your objects).
Once you will have a good understanding of how perspective works, you should even be able to draw objects in perspective without needing to position the vanishing points. Allowing you to quickly sketch some complex scenes.
You will then be able to reserve the use of vanishing points for complex urban or technical scenes.

The book Drawing and Sketching Objects and Environments from Your Imagination, by cott Robertson, is a great resource for people wishing to perfect into drawing in perspective. (Click on the image to discover the book on Amazon)
I hope you enjoyed this article. Do not hesitate to ask your questions. And do not hesitate to like it and share it on your favourite social media.
Stef