Drawing Perspectives Without Vanishing Points
Drawing Perspectives Without Vanishing Points
With vanishing points landing many times outside of the page, Drawing in perspective can be cumbersome. Happily, artists have come with a lot of tricks to render satisfying perspectives while removing part of the burden of the process. This is specifically the case of the Brewer method we are going to study in this article.
The Brewer method
The principle of the Brewer method is to draw a grid that provides reference lines for your vanishing lines. This is like drawing a perspective grid using a vanishing point, and then cutting your paper to just keep the area onto which you want to draw. This grid is then used to position and draw your subject.
The Brewer method can applied to the 1/2/3 point(s) perspective techniques. I will describe the process in the chapters below.
1 point perspective
We will start by applying the method for a 1 point perspective. This will serve as a basis for the other ones.
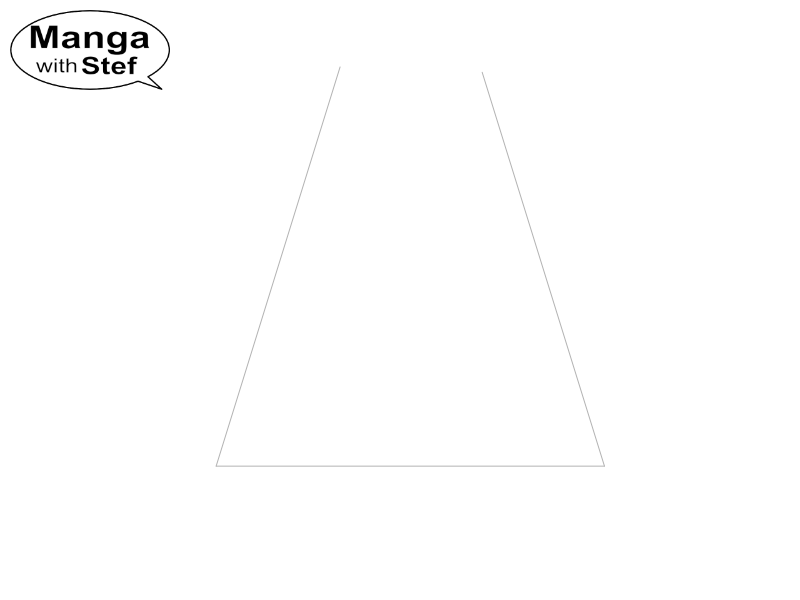
To use the method you need to have a rough idea of where and how you want to position your subject in the scene relative to an horizon line.
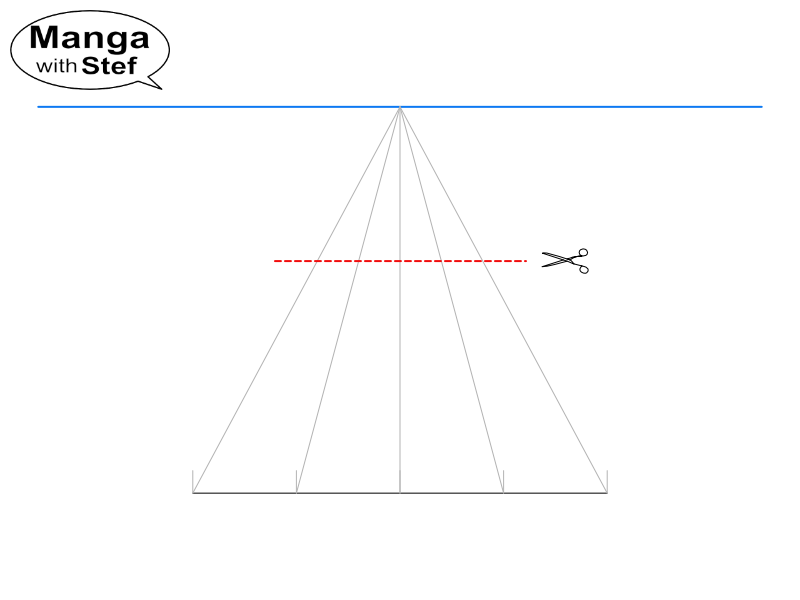
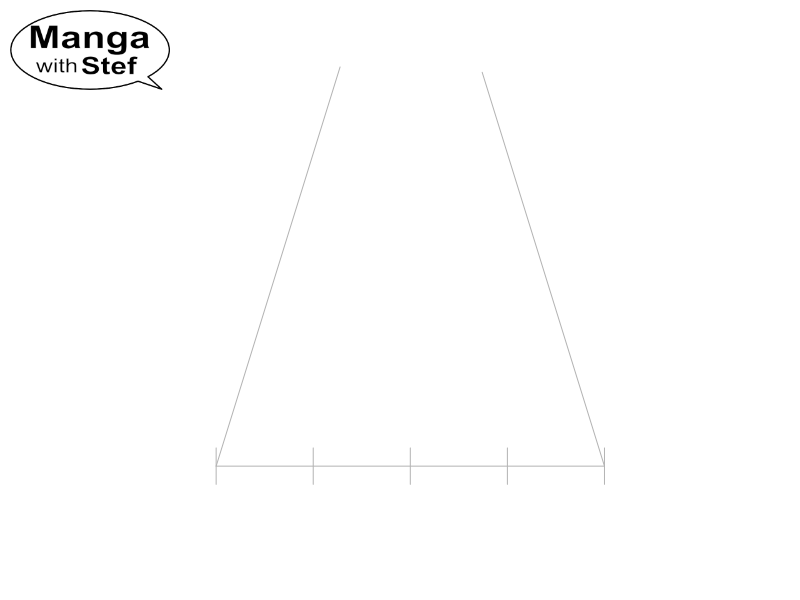
- You draw a reference line corresponding to one of the horizontal edges of that subject.
- Once this is done, you choose two points at the extremities of that reference line. from these two points you draw perspective lines stopping at the border of the page or of your panel. These lines will indicate the direction of the perspective you want to give to your subject.
(2) and the two lines indicating the direction of the vanishing point
- Next, you add some graduations on that reference line to serve as a base for your drawing grid.
- Then you add a line parallel to your reference line at the top/bottom of your page or panel according to the position of your subject relative to the viewer.
- On that line, you add the same number of graduations than you used on your reference line.

- The last step is to add the lines of your grid between the graduations on the reference line and the ones on your top/bottom line.

Now, you can use the perspective lines of the grid as guide for the perspective lines of your drawing. Your perspective lines have to follow the general direction of the grids’ perspective lines.
The objective here is not to be perfect. The objective is to render something convincing enough without all the hassle of sticking additional pieces of paper around your drawing to position your vanishing points.
As I indicated, the method can also be used for a subject that is located above the horizon. In that case, place the reference line at the top of your drawing, and the other line at the bottom.
2 points perspective
If you understood the principle of the Brewer method for the 1 point perspective, its application to the 2 points perspective should offer no difficulty.
Here, your reference line will be a vertical line, and you basically apply the method to both vanishing points located left and right to this reference line.
Of course it also works if one of the two vanishing points is on the drawing area, then you just have to apply it to the second vanishing point.
The steps to the method are simple and similar to the ones previously seen for the 1 point perspective:
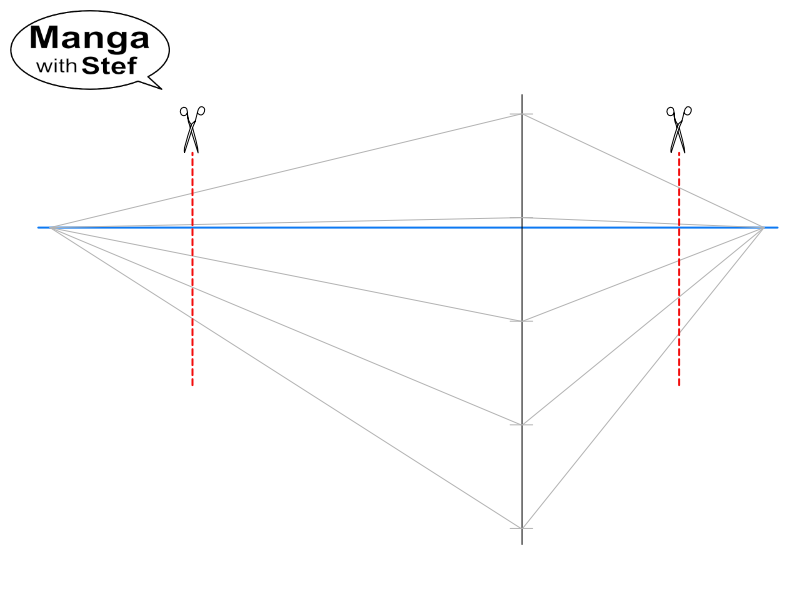
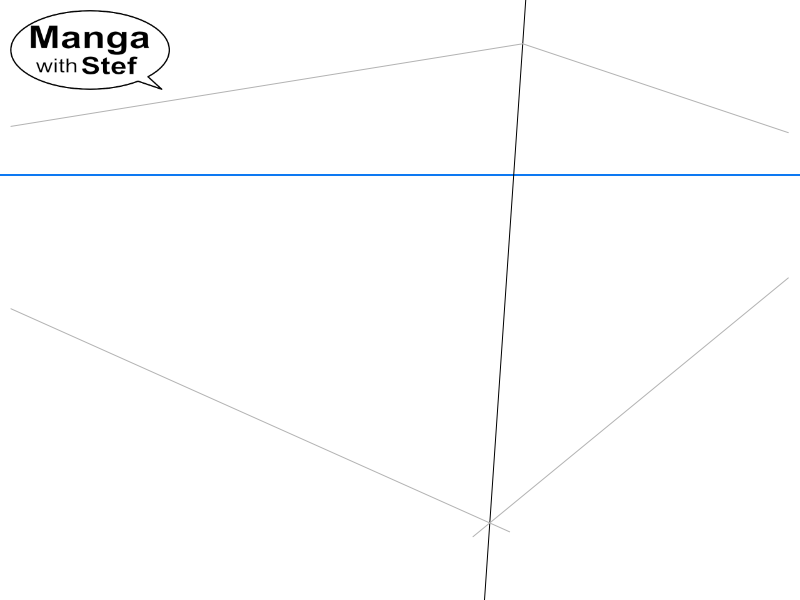
- Decide where your horizon line will be positioned and draw your vertical reference line.
- Select two points on that reference line and draw the directions of your perspective on both sides of the reference line. Remember that if your subject is not tilted your vanishing points are expected to be located on the horizon line.
- If the two perspective lines on one of the side don’t cross within the drawing, draw a vertical line on that side that crosses the perspective lines. Repeat on the other side if needed.
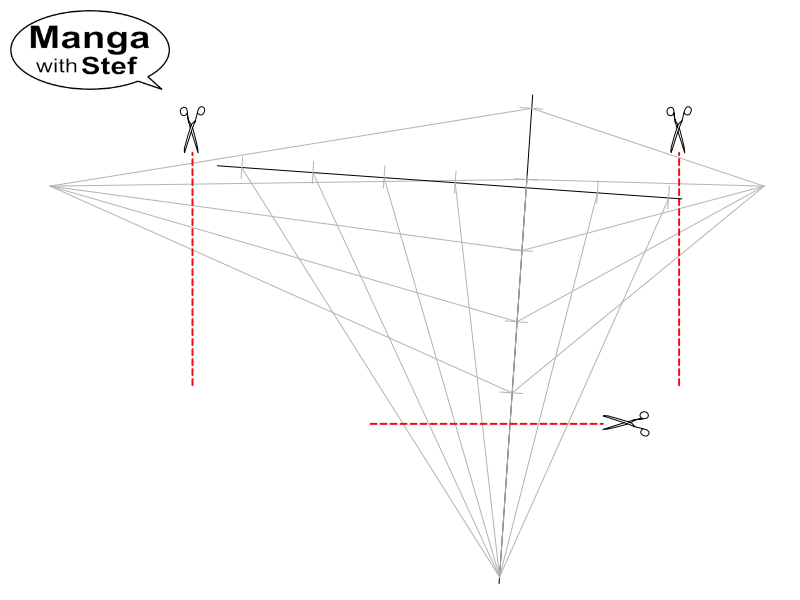
- Add some graduations on your reference line, and add the same number of graduations on the other lines you have added.
- Draw the grid lines on both sides between the graduations on the reference line and the corresponding ones on the other lines, or to the vanishing points if they are in the drawing.
Your grid is complete, you can now draw your subject by using the perspective lines on both side as guide lines.
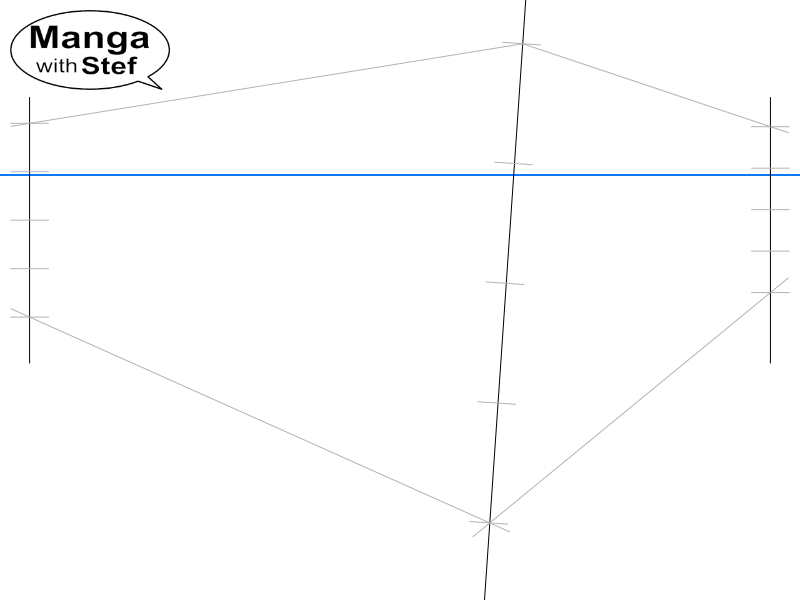
3 points perspective
Again, the Brewer method can be applied in similar fashion to 3 points perspective. The difference is now that as there will be a vanishing point for the verticals, and we shall therefore add a third graduated line
Here is the process to apply the Brewer method for a 3 points perspective:
- Decide where your horizon will be.
- Draw a tilted vertical line that will be used as a reference for the direction of your subject’s vertical lines.
- Select two points at the extremities of that vertical reference line, and draw the top and bottom vanishing lines for your subject on both the left and the right. Remember that these lines converge toward the horizon line.
(2) (3) the general direction of the vertical lines as well as the envelope for the vanishing lines to the left and to the right
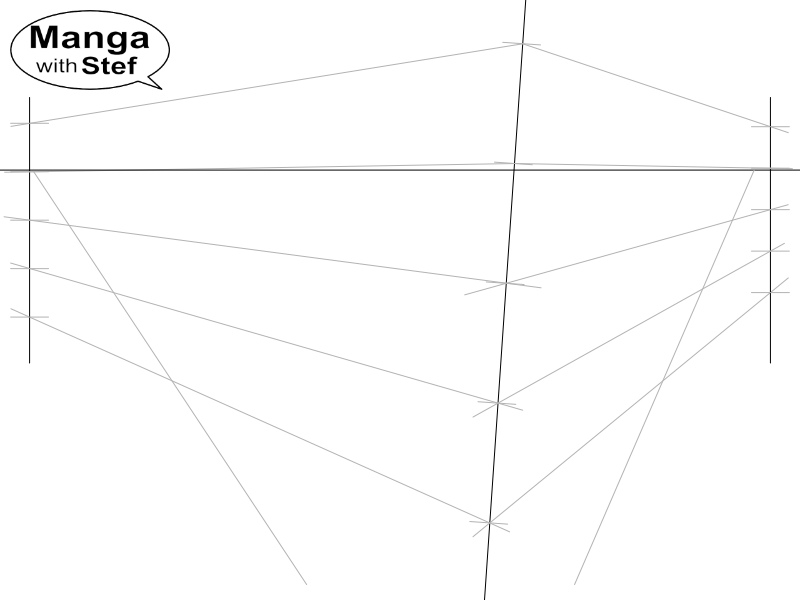
- If the left and/or right vanishing point(s) are outside of the frame of your drawing, draw a vertical line on the left and/or right of your frame that crosses your vanishing lines.
- Add graduation on your vertical reference line between the two points you selected, and add the same number of graduations on your left and/or right lines.
(5) and the graduations on the vertical reference line, and on the left and right lines
- Now draw vanishing lines between the graduations on the reference vertical line and the corresponding graduations on your left and/or right lines. You should have something close to what you would get for the 2 points perspective.

- If the horizon doesn’t show on your grid, add a horizontal line at the top or bottom of your frame according to the angle to which your subject is seen by the viewer.
- Select two points on the ends of this horizontal line, and draw the left and right vertical vanishing lines that will give the envelope of the other vertical lines. Remember these lines will converge at the bottom if your subject is seen from above, or at the top if it is seen from under.
(8) and the envelope for the verticals
- Draw a horizontal line that crosses your left and right vertical vanishing lines at the top/bottom of your drawing.
- Draw the same number of graduations on both horizontal lines.
- Draw vertical vanishing lines between the two lines matching graduations graduations
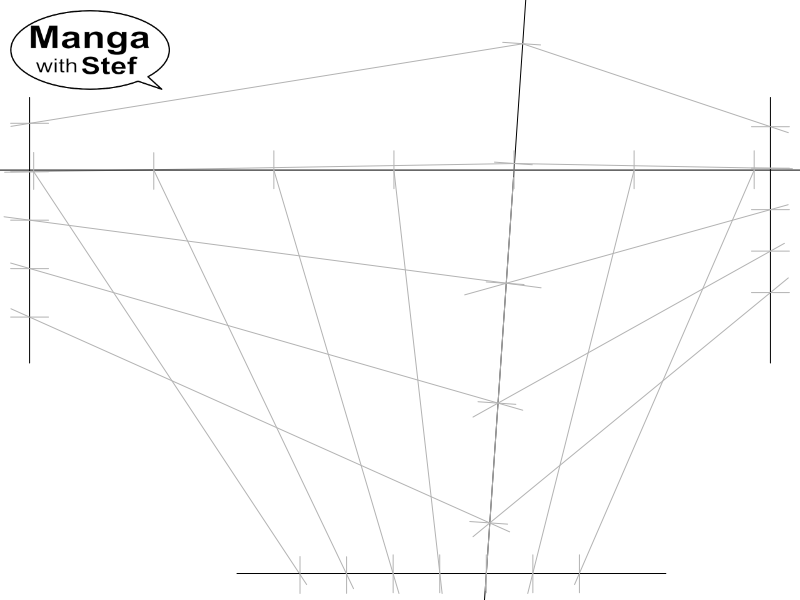
(10) the graduations on both horizontal lines
(11) and the vanishing line that pass through these graduations
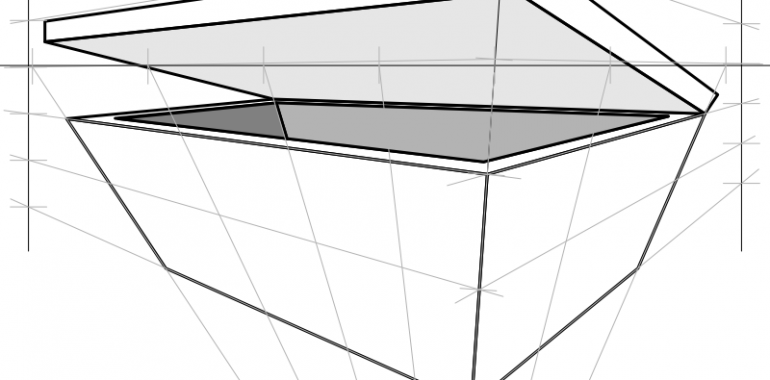
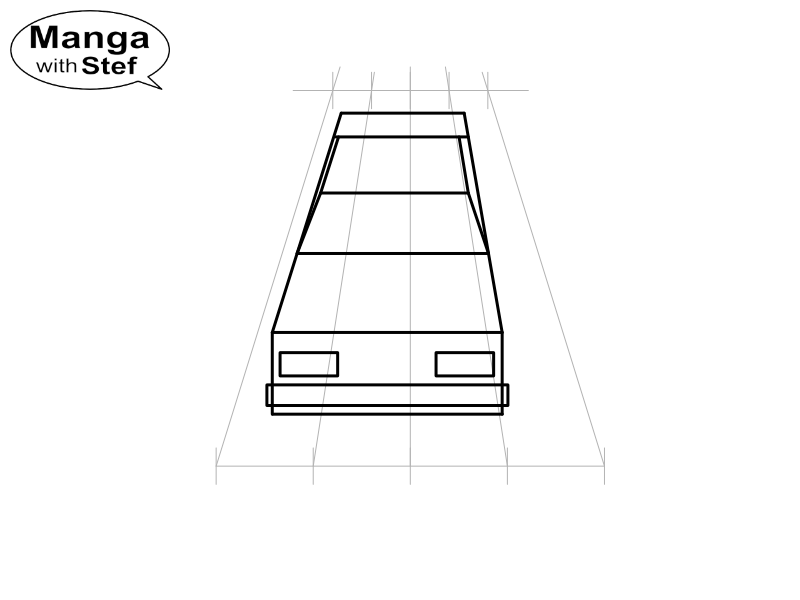
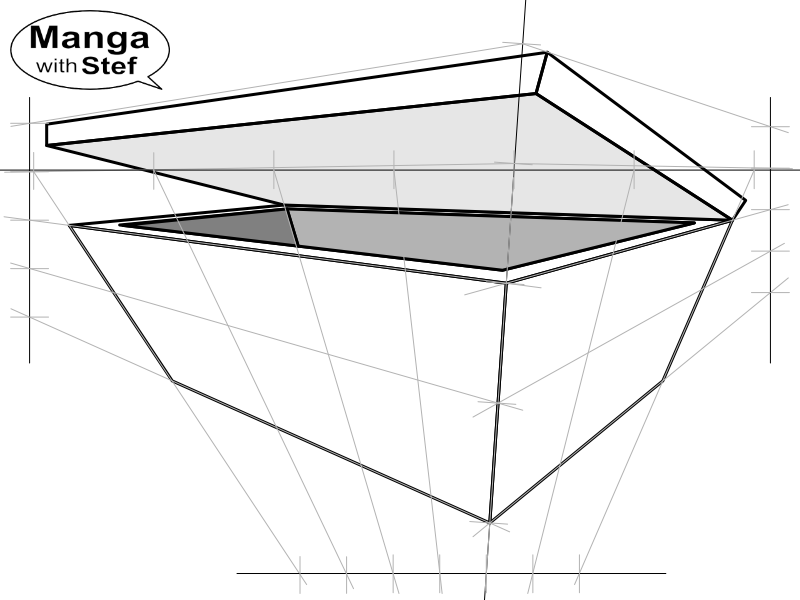
Now, your grid is complete and you can start your drawing. Below for instance, I drew an opened box seen from above.

The book Drawing and Sketching Objects and Environments from Your Imagination, by cott Robertson, is a great resource for people wishing to perfect into drawing in perspective. (Click on the image to discover the book on Amazon)
This is it for this article. With little practice you will quickly be able to use that Brewer method to position your subjects in perspective without the burden of sticking sheets of paper on the side of your drawings to position your vanishing points.
Do not hesitate if you have comments or questions!
Stef